

By the Yoganiro Editorial Team · Last Updated: August 2026
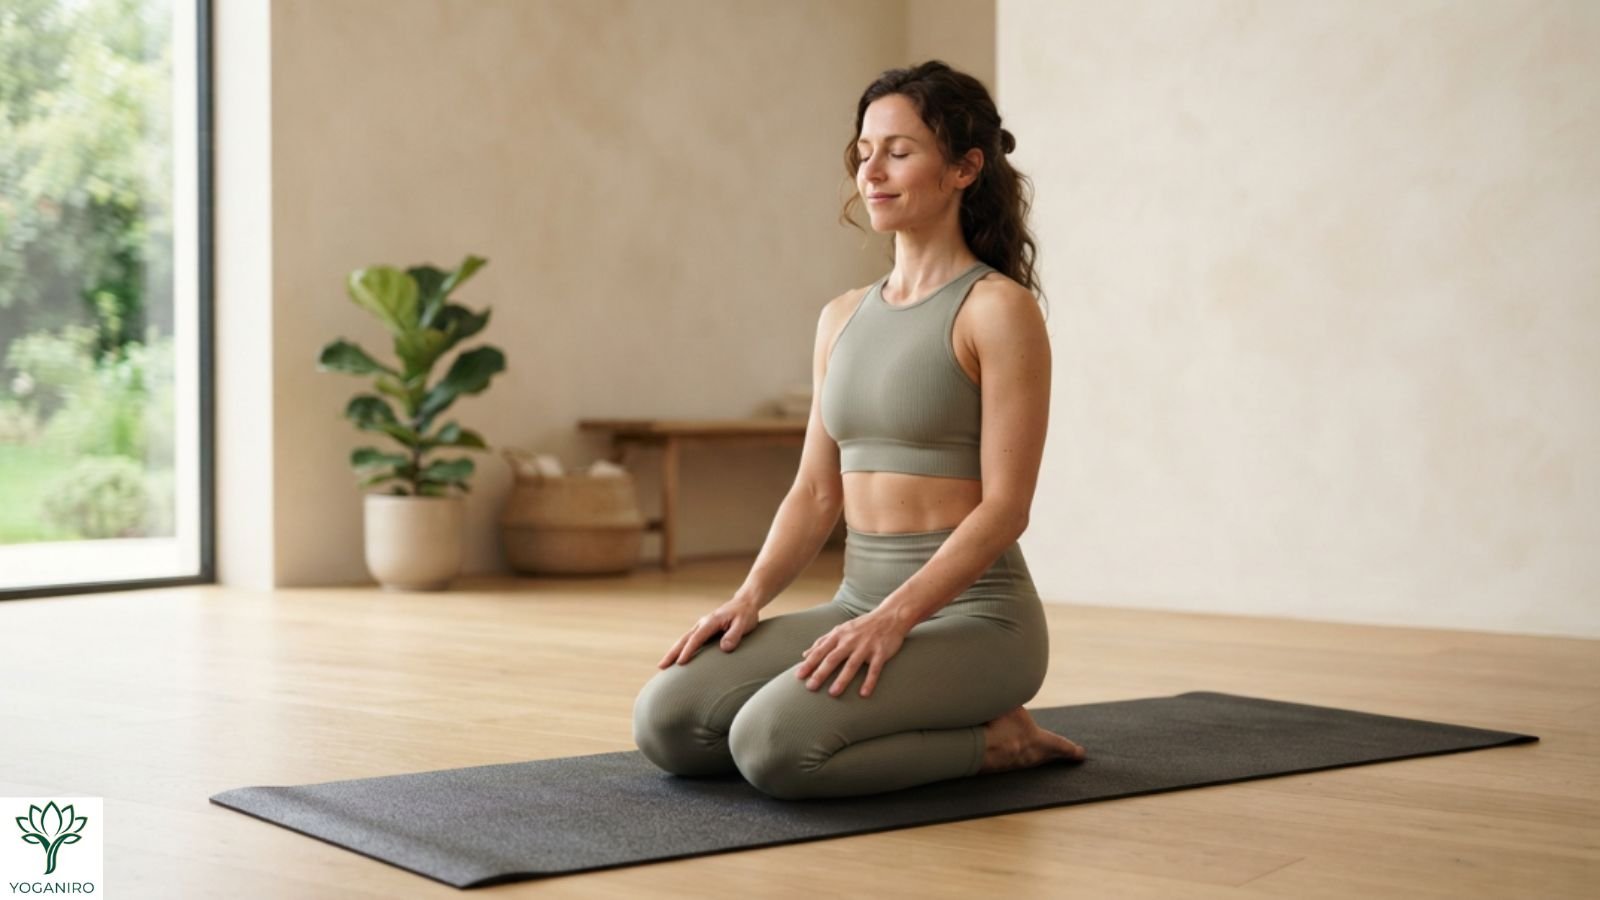
The name makes everyone smile. Then you tuck your toes under, sit back on your heels, and understand exactly why they call it Screaming Toe Pose. For thirty seconds, the soles of your feet have your complete, undivided attention.
That intensity is precisely the point. Your feet carry you through every single day, usually wrapped in stiff shoes, and they almost never get stretched. Screaming Toe Pose gives the toes, arches, and ankles the deep release they quietly crave.
This guide walks you through the pose from the ground up — what it is, why it feels so strong, how to move into it in seven clear steps, and how to soften it when your feet ask for mercy. You’ll also learn the counterpose that makes everything feel better afterward.
Quick Answer: Screaming Toe Pose is a kneeling yoga stretch where you tuck all ten toes under and sit back on your heels, deeply stretching the toes, soles, and plantar fascia. Hold it for 3 to 5 slow breaths, up to one minute — or 1 to 3 minutes in a yin practice. Strong sensation is normal; sharp pain is your signal to come out.
What Is Screaming Toe Pose?
Screaming Toe Pose is a kneeling stretch where you tuck your toes under and rest your weight back on your heels, sending a deep stretch through the toe joints and the soles of the feet. You may also hear it called Toe Squat, Broken Toe Pose, or a toes-tucked variation of Thunderbolt Pose (Vajrasana). Different names, same shape — and the same unmistakable sensation.
The pose is a staple of yin yoga, where long, quiet holds work on the deeper connective tissues as well as the muscles. It asks for almost no flexibility anywhere else in the body, which makes it one of the most accessible deep stretches in all of yoga. The challenge isn’t getting into the shape. It’s staying calm once you’re there.
What Are the Benefits of Screaming Toe Pose?
Screaming Toe Pose stretches the toes, the soles of the feet, and the plantar fascia — the thick band of tissue that runs from your heel to your toes and supports your arch. Regular practice improves toe and ankle mobility, which quietly supports everything above it: steadier balance, a more even walking stride, and more comfortable time on your feet.
The pose works as a gentle antidote to modern footwear. Shoes hold the toes in one cramped position for hours, and the small joints of the feet slowly lose their range. A minute of tucked toes a few times a week asks those joints to remember what they can do. Practitioners of traditional Chinese medicine also value the pose because, in that tradition’s view, several meridian lines begin or end in the toes. That is a cultural perspective rather than a scientifically proven effect — the physical stretch is reason enough to practice.
| Benefit | How it helps |
|---|---|
| Deep plantar fascia stretch | Releases the tissue that supports your arch |
| Toe and ankle mobility | Restores range that shoes slowly take away |
| Stronger, livelier feet | Supports balance and a more even stride |
| Tension release | The feet hold more stress than you realize |
| Zero flexibility barrier | Accessible to nearly every body from day one |
How Do You Do Screaming Toe Pose Step by Step?
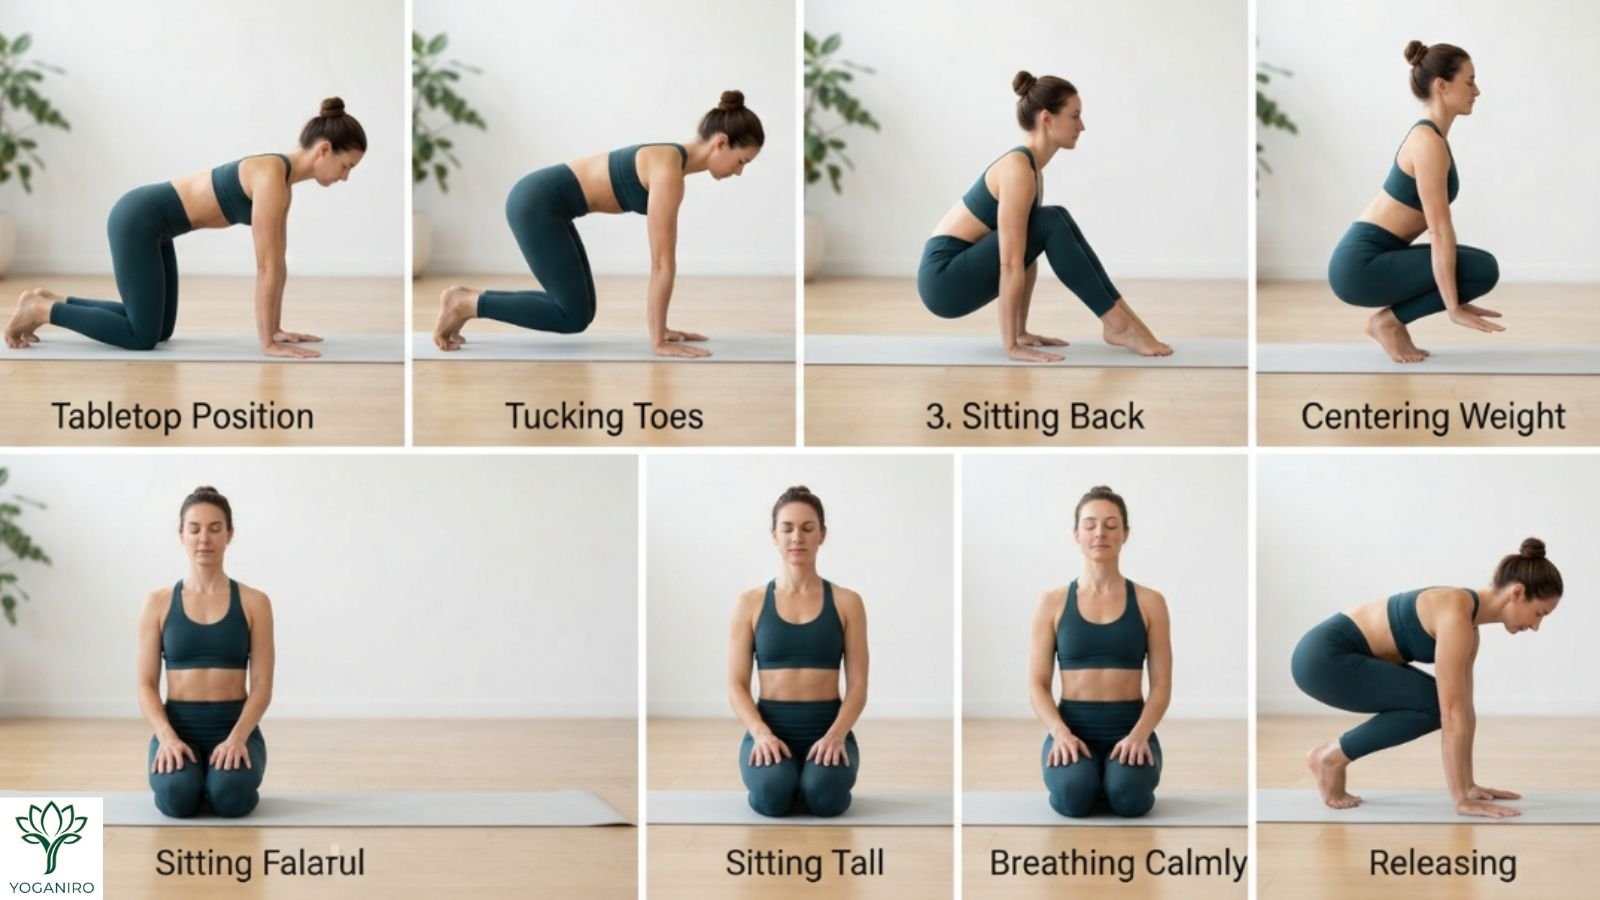
You can move into Screaming Toe Pose in seven simple steps. Read them once, then move slowly — the pose builds fast.
- Start in a tabletop position on hands and knees, with your knees under your hips.
- Tuck all ten toes under, one foot at a time. Reach back and tuck the little toes by hand — they escape on almost everyone.
- Walk your hands back toward your knees and slowly sit your hips onto your heels.
- Center your weight on the balls of your feet, not the tips of the toes.
- Rest your hands on your thighs and lengthen your spine, ears stacked over shoulders and hips.
- Breathe slowly and evenly. Let the sensation be strong but steady.
- To release, shift your weight forward onto your hands, untuck your toes, and rest the tops of your feet on the mat.
How Should You Warm Up First?
A short warm-up softens the intensity considerably. Spend 2 to 3 minutes rolling each sole over a massage ball or rolled towel, then circle your ankles five times in each direction. Even a brisk one-minute walk wakes the feet up. Cold feet make the pose sharper than it needs to be.
How Long Should You Hold Screaming Toe Pose?

Hold Screaming Toe Pose for 3 to 5 slow breaths, up to about one minute, when you’re starting out. In a yin-style practice, the hold extends to 1 to 3 minutes so the connective tissue has time to release — our guide to yin yoga poses explains how those longer, quieter holds work. Build duration gradually over weeks. Two short rounds beat one heroic hold every time.
Why Does Screaming Toe Pose Hurt So Much?
Screaming Toe Pose feels intense because it stretches joints and tissue that almost nothing in daily life ever touches. The toe joints spend their days braced inside shoes, and the plantar fascia is dense, slow-to-change connective tissue. When you finally load it into a full stretch, the sensation arrives all at once.
Here’s the distinction that keeps the pose safe: strong, spread-out, burning sensation across the soles is the stretch doing its work. Sharp, stabbing, or electric pain in one specific spot — especially in a toe joint or the knee — means come out now. The pose should never make you hold your breath. If it does, you’ve gone past the useful edge. In practice, most people find the intensity drops noticeably within two to three weeks of regular visits.
From the Yoganiro mat: the first time our team held this pose for a full minute, the room went silent — then everyone laughed. By week three, the same hold felt like a warm exhale through the soles. Give it fourteen honest days before you judge it.
What Are the Most Common Mistakes in Screaming Toe Pose?
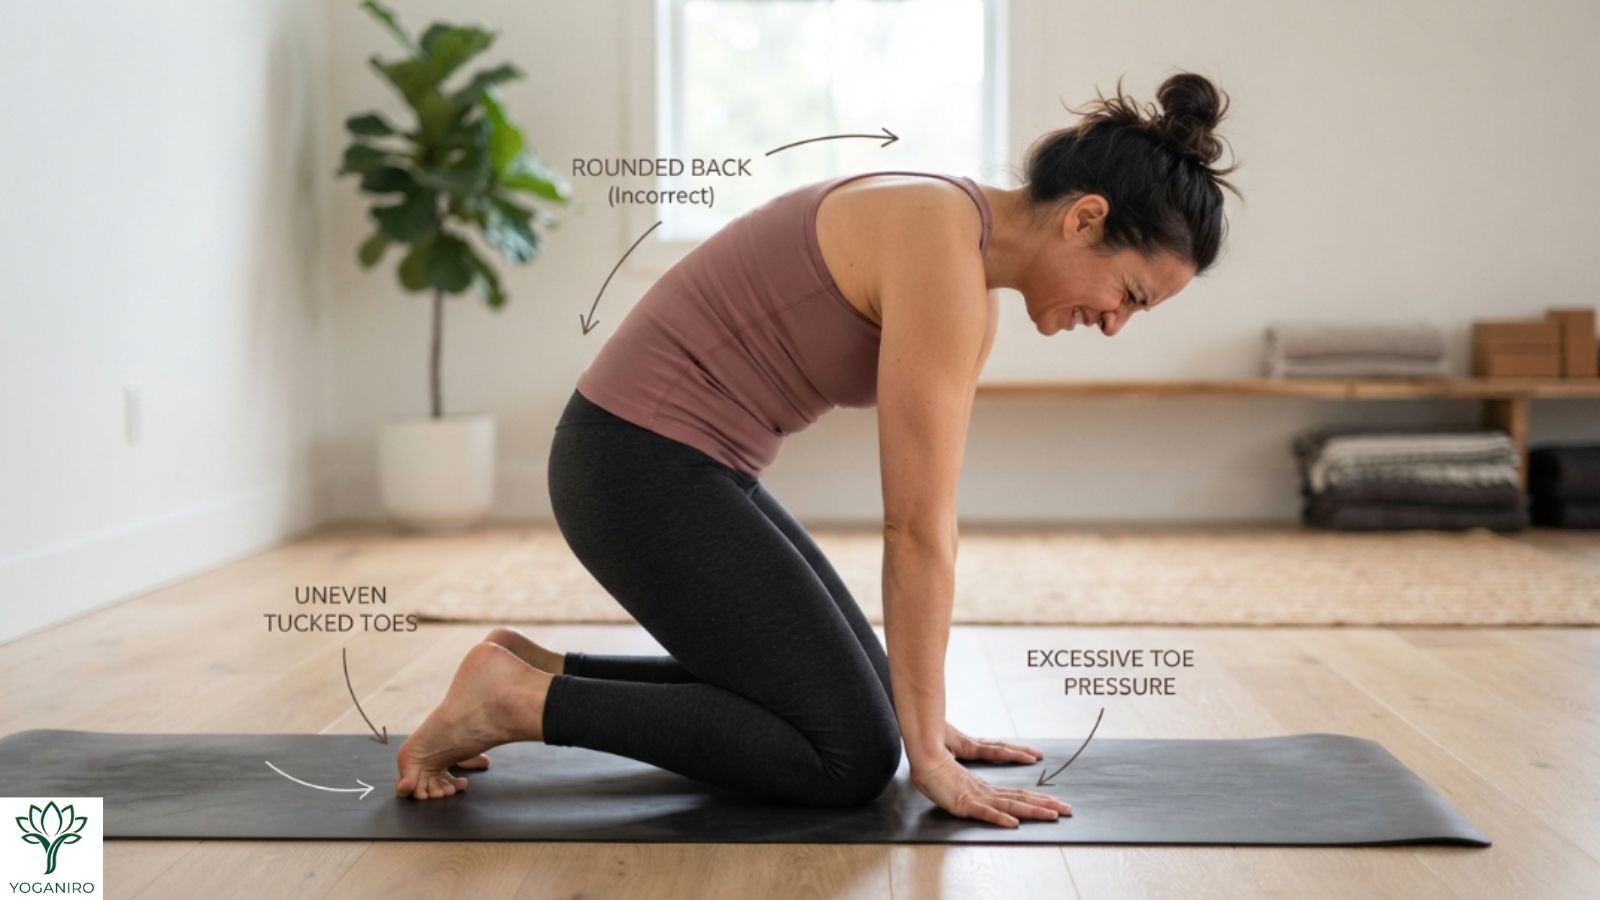
The most common mistake is leaving the little toes untucked. They slip out on nearly everyone, and an untucked little toe twists the foot and concentrates the stretch unevenly. Reach down and tuck them by hand every single time — no exceptions.
Two more habits are worth catching early. Perching on the tips of the toes instead of the balls of the feet turns a deep stretch into a joint strain; shift your weight back until the balls of the feet carry you. And slumping forward to escape the sensation robs the pose of its second job — posture. Keep your spine tall and let the intensity stay in the feet, where it belongs. Finally, don’t force the clock. Thirty honest seconds serve you better than three resentful minutes.
How Do You Modify Screaming Toe Pose?
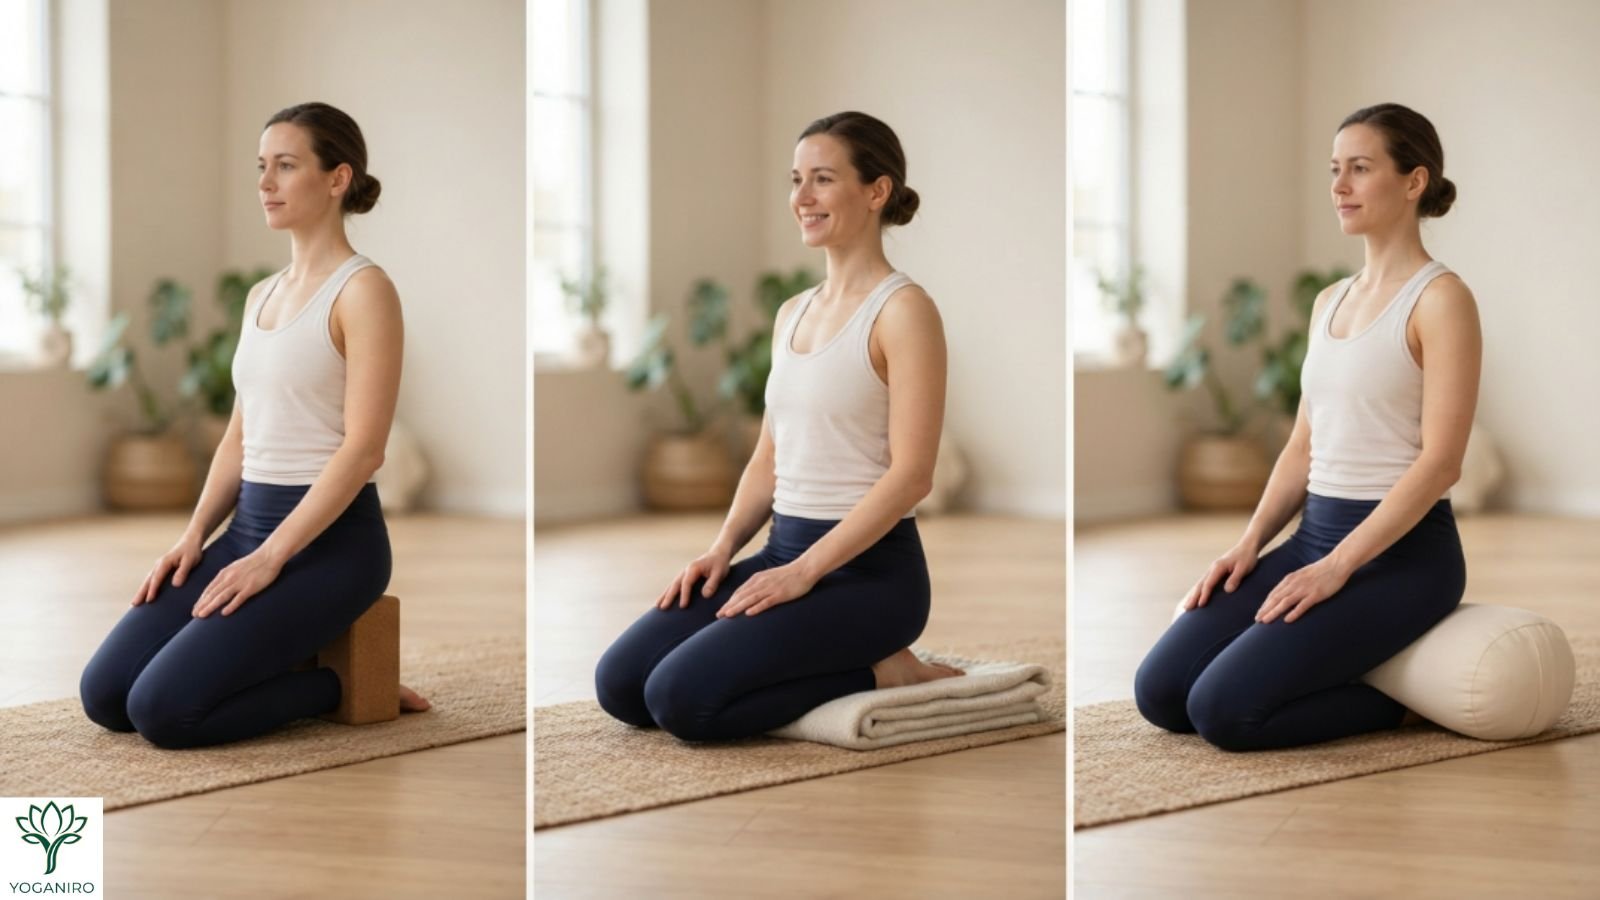
You can soften Screaming Toe Pose to fit your feet on any given day. Place a block or folded blanket between your heels and hips to lighten the load on the toes. A cushion under the knees helps on hard floors, and a yoga bolster under the hips turns the pose into a far gentler introduction.
When the sensation peaks mid-hold, rise up onto your knees for a few breaths, then sit back down when you’re ready — this simple interval approach is how most people build up to longer holds. You can also keep your hands on the mat in front of you and control exactly how much weight moves back into the heels. The full pose isn’t the goal. The stretch is.
Can You Add the Triceps Stretch Variation?

Yes — once the base pose feels steady, Screaming Toe Pose pairs beautifully with a triceps stretch. Reach your right arm overhead, bend the elbow so your palm rests between your shoulder blades, and use your left hand to gently draw the elbow back. Hold for 3 to 5 breaths, then switch sides.
This variation turns a foot stretch into a compact full-body reset: feet, ankles, shoulders, and triceps in one quiet shape. Keep your spine tall rather than arching back, and skip the arms entirely on days when your balance feels shaky — the feet always come first.
Is Screaming Toe Pose Good for Runners and Plantar Fasciitis?
Screaming Toe Pose is one of the most valuable stretches for runners, walkers, and anyone whose training keeps them in stiff shoes — including cyclists, whose feet spend hours locked into rigid soles; our yoga for cyclists guide pairs well here. Regular practice keeps the plantar fascia supple and the toe joints mobile, which supports healthier foot mechanics mile after mile.
Plantar fasciitis deserves a more careful answer. Stretching the plantar fascia and calves is a standard, first-line part of treating the condition, according to the Cleveland Clinic — though this specific pose has not been clinically studied for it, so treat the stretch as a complement to professional care, never a replacement. For many people, gentle toe-tucked stretching eases tightness through the arch and heel over time. For others — especially during an active flare — loading the fascia this directly can aggravate symptoms. Start with short, soft holds, stop if you feel heel pain rather than stretch, and check with your doctor or physical therapist before using the pose as part of any recovery plan.
What Counterpose Should You Do After Screaming Toe Pose?
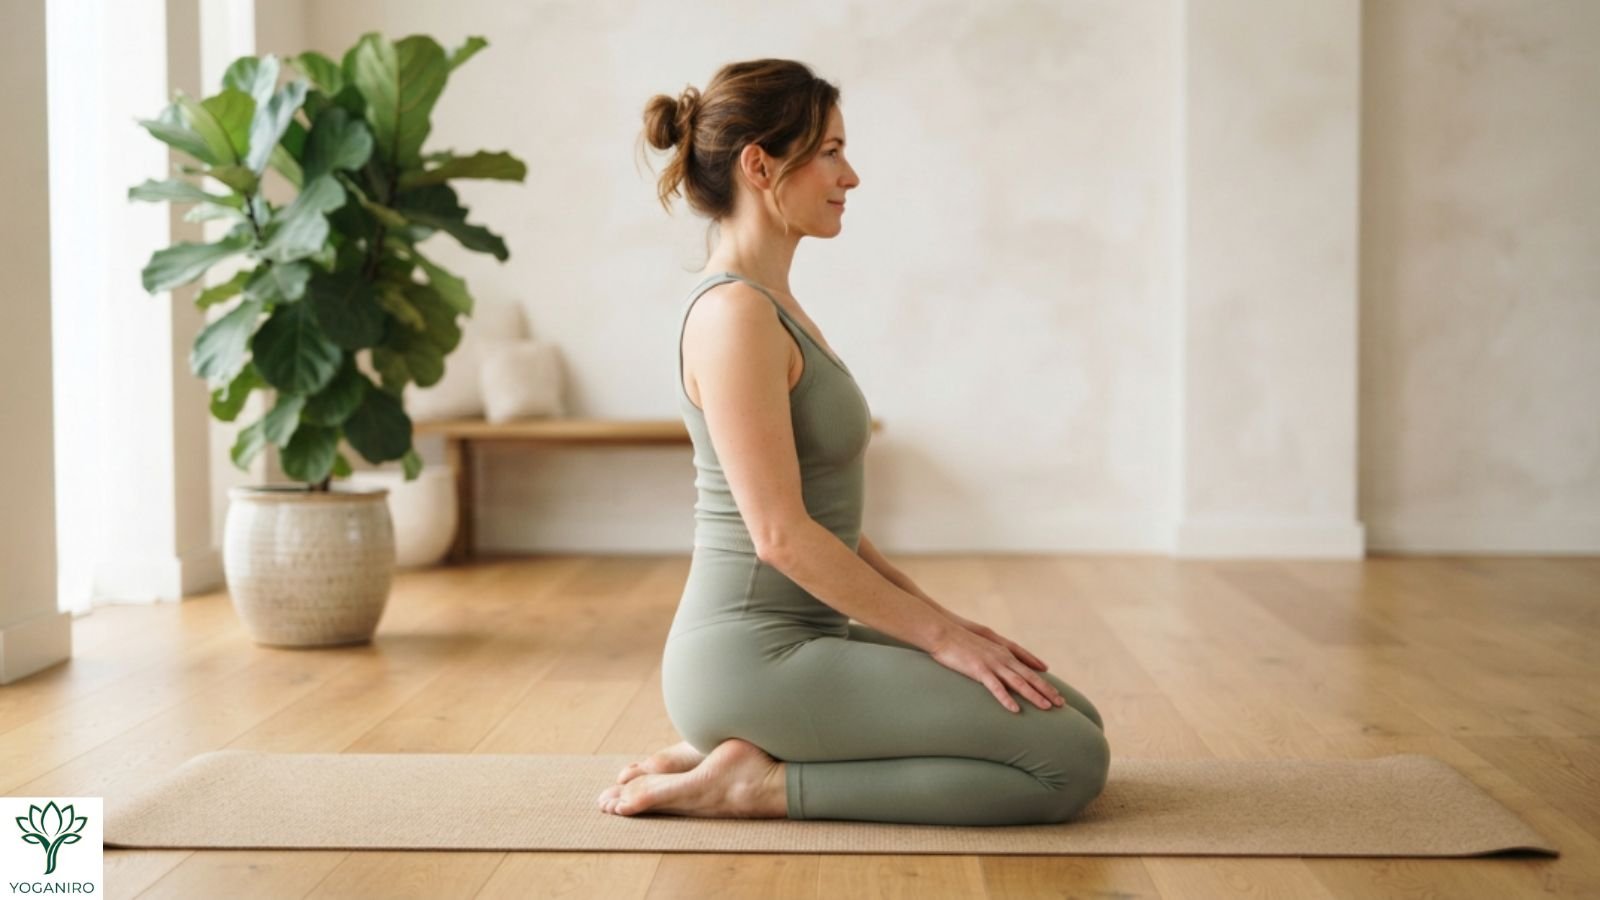
The classic counterpose is the Ankle Stretch: untuck your toes, rest the tops of your feet flat on the mat, and sit back on your heels so the stretch reverses to the front of the ankles. Lean back slightly onto your fingertips to deepen it. Hold for 5 slow breaths.
After that, wiggle and spread your toes for a few seconds, then step back into Downward Dog and pedal your heels. That simple three-part sequence — tuck, reverse, pedal — leaves the feet feeling warm, light, and strangely grateful. Most students say the moment after the pose is the best part.
Who Should Avoid Screaming Toe Pose?
You should skip or modify Screaming Toe Pose if you have an actual toe or foot injury — the nickname is a joke; practicing on a genuinely broken toe is not. Recent ankle or knee surgery, significant knee pain in kneeling positions, and gout flares are also clear reasons to sit this one out until you’re cleared to return.
The same caution applies to arthritis in the toe joints, and to anyone with reduced sensation in the feet — for example, from diabetes-related peripheral neuropathy — because feet that cannot feel the sharp-pain warning signs cannot keep this pose safe. Anyone with an active plantar fasciitis flare should approach gently, as covered above, and people with balance concerns can keep fingertips on a wall or chair. During pregnancy, the kneeling shape is generally comfortable with support under the hips, but pregnancy loosens the joints, so keep holds short and confirm with your healthcare provider. These are general safety guidelines rather than medical advice — check with your doctor before practicing if you have any concerns about your feet, ankles, or knees.
Frequently Asked Questions
Why is it called Screaming Toe Pose?
The name comes from the intense stretch that floods the toes and soles the moment you sit back on your heels. Your toes feel like they’re “screaming” for the first few breaths. The same shape is also called Toe Squat or Broken Toe Pose — all names for one toes-tucked kneeling stretch.
Is Screaming Toe Pose safe for beginners?
Yes, Screaming Toe Pose is safe for beginners because it requires no flexibility to enter and is easy to control. Start with 3 to 5 breaths, keep your weight on the balls of your feet, and rise onto your knees whenever the sensation peaks. Build toward longer holds over several weeks.
How long should you hold Screaming Toe Pose?
Hold Screaming Toe Pose for 3 to 5 slow breaths, up to one minute, as a beginner. In yin yoga, holds extend to 1 to 3 minutes so the connective tissue can release. Come out immediately if you feel sharp pain in a toe joint or knee rather than a broad stretch.
Does Screaming Toe Pose help plantar fasciitis?
Screaming Toe Pose may ease plantar fascia tightness for many people, since it stretches the tissue directly. During an active flare, though, it can aggravate heel pain. Use short, gentle holds, stop if you feel pain rather than stretch, and ask your doctor or physical therapist before adding it to a recovery plan.
What is the difference between Screaming Toe Pose and Toe Squat?
There is no difference — Screaming Toe Pose and Toe Squat are two names for the same kneeling, toes-tucked stretch. Yin yoga teachers usually say Toe Squat, while vinyasa and fitness teachers often use the playful Screaming Toe name. It also appears as Broken Toe Pose or a toes-tucked Vajrasana.
Can you do Screaming Toe Pose every day?
Yes, you can practice Screaming Toe Pose daily as long as your feet recover comfortably between sessions. One to two minutes after a workout or in the evening works well. If your toe joints feel sore the next morning, drop to three or four sessions a week and shorten the holds.
Trusted Resources
These credible sources informed this guide and offer further reading:
- Yoga Journal — Stretches for Plantar Fasciitis: 6 Yoga Poses to Relieve Heel Pain
- Yin Yoga (Bernie Clark) — Toe Squat: Benefits, Contraindications & Options
- Mayo Clinic — Plantar Fasciitis: Symptoms & Causes
- Cleveland Clinic — Plantar Fasciitis: Causes, Symptoms & Treatment
Final Thoughts
Screaming Toe Pose rewards patience over toughness. The intensity that makes you laugh on day one fades into a warm, workable stretch within a few weeks — and your feet repay the attention with every step you take off the mat. Tuck your toes, find your breath, and let the sensation teach you where your edge is. One steady minute is all this pose ever asks.
About Yoganiro
Yoganiro is a yoga and wellness publication dedicated to clear, honest, and practical guidance. Every guide is fact-checked against credible sources such as Yoga Journal, Harvard Health, and peer-reviewed research before it is published. Questions or corrections? Reach out through our contact page.

Yoganiro was founded by Abdul Rehman with a passion for yoga, wellness, and mindful living. The goal behind Yoganiro is to inspire people through simple yoga practices, wellness tips, and healthy lifestyle content that promotes balance, peace, and overall well-being.