

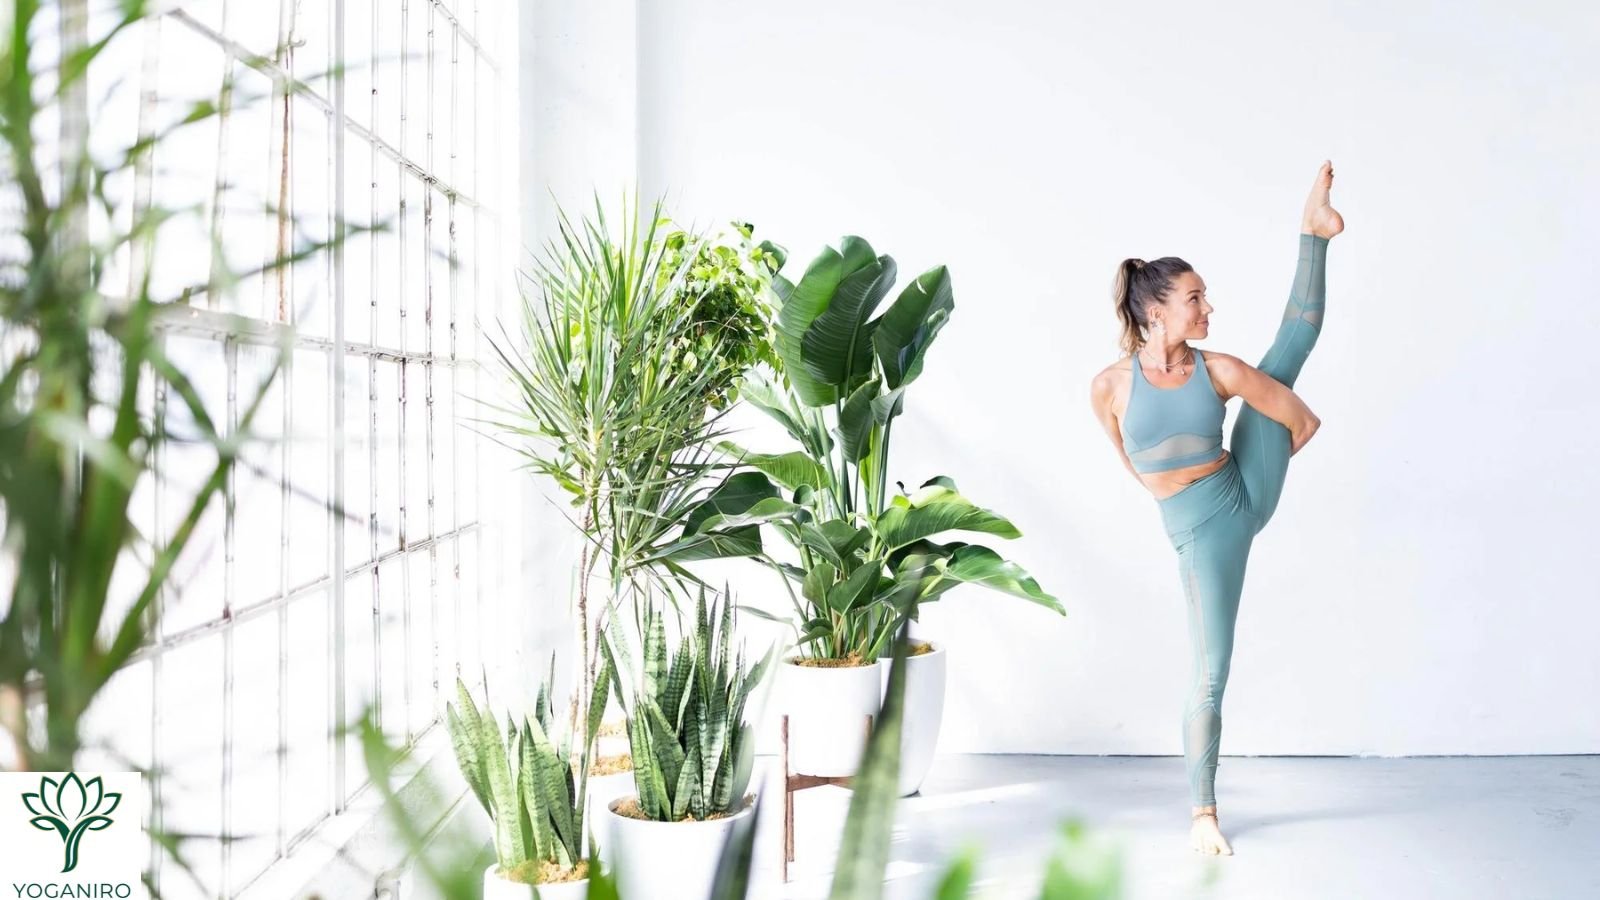
Bird of paradise yoga combines a standing balance with an arm bind around the lifted leg. The extended leg may catch your attention first, but learning the bind, weight shift, and controlled return to the floor comes before reaching higher.
This guide explains how to approach the pose in six steps, which preparations to explore, and how to adjust when the full position feels too demanding.
Quick Answer: Bird of Paradise, or Svarga Dvijasana, is an intermediate-to-advanced standing yoga pose. Bind around one thigh, transfer your weight to the opposite foot, and rise with the lifted knee bent. Straightening that leg is optional. Learn unfamiliar transitions with a qualified instructor.
What Is Bird of Paradise Pose?
Bird of Paradise involves balancing on one foot while the arms wrap around the opposite thigh and connect behind the body. In the full expression, the lifted leg extends outward and upward.
The pose combines several movements, so it helps to practice them separately before bringing them together.
How Difficult Is the Pose?
Peloton classifies Bird of Paradise as intermediate to advanced. Its combination of balance, mobility, and coordination makes it more demanding than a basic standing pose.
This guide uses three descriptions:
| Variation | What you practice |
|---|---|
| Preparation | Individual components, such as a grounded bind or supported balance |
| Modified pose | The standing balance with a bent lifted knee or a strap between the hands |
| Full expression | The standing balance and bind with the lifted leg extended |
These labels describe the movement rather than a universal readiness standard. A modified version can still be challenging.
For other options, explore Yoganiro’s intermediate yoga poses with supported variations.
What Are the Benefits of Bird of Paradise?
Bird of Paradise gives you a way to practice single-leg balance, coordinated movement, and attention to your position. Those practice demands should be distinguished from proven health outcomes.
A randomized trial involving 40 female college students reported improvements in balance and flexibility after a 16-week yoga program. However, the program included many practices and did not isolate Bird of Paradise. Its results cannot establish benefits from this pose alone.
Useful practice goals include understanding the arm position, transferring weight without rushing, and lowering your foot deliberately.
Before You Start
Prepare Your Space
Choose a level, nonslip surface and clear enough room to step out of the pose. Arrange your strap or other props before beginning.
Read the entry and exit instructions first. If the bind is unfamiliar, learn it with both feet grounded before adding the standing transition.
Know When to Seek Guidance
The National Center for Complementary and Integrative Health recommends qualified instruction and individual modifications when needed. Pregnancy, existing injuries, balance problems, and certain health conditions may require avoiding or adapting particular poses.
Ask your healthcare professional and instructor about your individual needs when these considerations apply. Stop if you experience pain, numbness, dizziness, or painful pressure in a joint.
How to Warm Up Before Bird of Paradise
Begin with familiar movements before exploring the bind or single-leg transition. Choose preparation poses with your instructor according to the component you want to practice.
| Preparation pose | Practice focus | Starting option |
|---|---|---|
| Supported Tree | Standing balance | Keep one hand on a wall and the lifted foot’s toes grounded |
| Extended Side Angle | The starting stance and torso position | Leave the arms unbound |
| Bound Side Angle | The arm position around the front thigh | Use a strap when appropriate |
| Supported Half Moon | Transferring weight onto one leg | Use a stable block and a manageable range |
Peloton’s preparation suggestions include Tree, Bound Side Angle, and Half Moon. They introduce components of the pose, but completing them is not a readiness test for the full balance.
Yoganiro’s yoga poses for balance guide includes supported options. For block selection during preparation, see our 3-inch versus 4-inch yoga block comparison.
This is a suggested preparation framework, not a researched treatment program.
How to Practice Bird of Paradise Yoga in 6 Steps
These instructions describe lifting the left leg while standing on the right foot. Learn unfamiliar arm positions and transitions with a qualified instructor.
1. Establish the Grounded Bind
Begin in Extended Side Angle with your left foot forward, left knee bent, and right foot behind you. Keep both feet grounded.
Pass your left arm beneath the left thigh. Reach your right arm behind your torso and connect your hands near the outside of your left hip. Use a strap if needed rather than forcing the connection.
Yoga Journal’s teaching sequence describes this arm path and the option of using a strap.
2. Bring Your Feet Closer
Look toward the floor. Keep the left knee bent as you step your right foot forward.
Finish with your feet slightly wider than hip-width apart and both sets of toes pointing in the same direction. Take smaller steps if needed.
3. Shift Your Weight to the Right Foot
Gradually transfer your weight onto the right foot. Lift your left heel while keeping the left toes lightly grounded.
Pause here. Practicing the weight shift without lifting the entire foot is an option.
4. Rise With the Left Knee Bent
Lift your left foot and slowly bring your torso upright. Keep the lifted knee bent and your gaze steady.
Give yourself time to settle before adding another movement.
These transitions follow Yoga International’s Bird of Paradise instructions.
5. Explore an Optional Extension
If steady, gradually extend your left knee without swinging the leg. Keep the standing foot grounded and your torso upright.
Bend the lifted knee again if you begin to teeter. Yoga Journal’s pose guide emphasizes stability while extending the leg.
6. Lower Your Foot With Control
Rebend the left knee. Hinge forward slowly and lower the left foot to the floor.
Once both feet are grounded, release the bind and return to standing without rushing. Rest before reversing the arm and leg positions for the other side.
This return through a forward fold follows Yoga Journal’s longer teaching sequence.
How Long Should You Hold the Pose?
Begin with a brief, comfortable attempt. Leave while you can still control the descent rather than waiting until fatigue makes the exit difficult.
This guide does not prescribe a fixed hold time. Your instructor can help you choose a duration appropriate to your experience and balance.
What Are the Common Mistakes?
Use the following observations to choose a smaller movement or a more suitable preparation. They do not diagnose the reason a pose feels difficult.
| What you notice | What to adjust |
|---|---|
| You force your hands together | Use a strap or return to an unbound preparation |
| You rush the rise | Practice the grounded weight shift with an instructor |
| Your torso leans farther as the leg extends | Reduce the extension or keep the knee bent |
| You try to make both sides look identical | Allow different ranges and preparations |
| You hurry to put the foot down | Review the exit from a less demanding variation |
Pain is a reason to stop the attempt, not a cue to pull harder or hold longer.
How Do You Modify Bird of Paradise?
Use a Strap Between Your Hands
Hold a length of strap between your hands along the same arm path. Set the grip while both feet are grounded, leaving enough space to avoid forcing the shoulders.
Yoga International suggests a wider grip or a strap when the bind feels restrictive.
Our D-ring versus cinch-buckle yoga strap guide explains equipment differences. In this variation, the strap bridges your hands; it does not provide external balance support.
Keep the Lifted Knee Bent
You can remain in the bent-knee version without progressing to an extended leg. Choose the range that allows a controlled torso position and descent. Yoga Journal includes this bent-leg variation in its instructions.
Keep the Components Separate
Practice the grounded bind and supported standing balance separately when combining them feels overwhelming. A preparation can be the focus of an entire practice.
Learn Wall Support With an Instructor
Yoga International mentions placing the back near a wall, but its written description does not provide a complete setup. Ask an instructor to demonstrate positioning and the exit before attempting this variation.
Bird of Paradise Yoga FAQ
Can Beginners Work Toward Bird of Paradise?
Beginners can explore appropriate preparations with instruction. The complete standing bind remains demanding, even when a strap is used. Supported balance and unbound standing poses offer places to begin.
Why Can’t I Straighten My Lifted Leg?
The pose combines several movement demands, so difficulty extending the leg does not identify one specific cause. Keep the knee bent and ask an instructor to assess your setup rather than forcing the extension.
Can I Practice Without Clasping My Hands?
A strap can bridge the hands. If maintaining that position still feels uncomfortable, practice an unbound preparation instead. There is no requirement to complete the bind.
How Long Does It Take to Learn?
The reviewed sources do not establish a reliable learning timeline. A more comfortable preparation or a smoother transition can be a useful goal without setting a deadline for the full expression.
Is Bird of Paradise the Same as Bird Dog?
No. Bird of Paradise is a standing balance with an arm bind. Bird Dog starts on hands and knees and typically involves reaching opposite limbs. You can find Bird Dog instructions in Yoganiro’s balance guide.
Trusted Resources
These resources support the instructions and evidence discussed above:
- Yoga International: Bird of Paradise setup and modifications
- Yoga Journal: Bird of Paradise teaching sequence
- Peloton: Bird of Paradise preparation and variations
- NCCIH: Yoga effectiveness and safety
Final Thoughts
Approach bird of paradise yoga one component at a time. The grounded bind, weight shift, bent-knee balance, and optional extension each deserve attention.
For your next practice, choose one component to review with a qualified instructor. Aim for an entry and exit you can control, and keep the variation that lets you move and breathe comfortably.

Yoganiro was founded by Abdul Rehman with a passion for yoga, wellness, and mindful living. The goal behind Yoganiro is to inspire people through simple yoga practices, wellness tips, and healthy lifestyle content that promotes balance, peace, and overall well-being.