

Intermediate yoga poses help you explore balance, strength, and coordination through movements that build on familiar foundations. Warrior III, Half Moon, Eagle, Boat, Side Plank, Dolphin, Camel, and Lizard offer different challenges, with supported variations that make them easier to approach.
Start with two or three poses rather than trying everything at once. Wall-supported Warrior III, bent-knee Boat, and a gentle Lizard variation make a useful starting combination.
Quick answer: Choose a pose that interests you, begin with its easier preparation, and learn both the entry and exit. Use support where helpful, keep breathing comfortably, and increase the challenge only when you can control the movement.
What Makes a Yoga Pose Intermediate?
In this guide, “intermediate” describes a variation that adds a challenge to a familiar movement. You might balance on one foot, support more weight through your arms, or coordinate your torso and limbs in a new way.
Difficulty varies between people and between poses. A standing balance might feel comfortable while a kneeling backbend feels unfamiliar. That doesn’t mean you need to force the backbend to catch up.
This article presents a general selection of poses, rather than a formal sequence from a particular yoga tradition.
The difficulty labels used throughout mean:
- Easier preparation: A supported or less demanding way to explore the movement.
- Intermediate variation: An option that asks for more balance, strength, mobility, or coordination.
These labels describe the variations—not your worth or progress as a yoga practitioner. Props remain useful at every stage.
How Do You Know Which Pose to Try Next?
Look for Control in Related Movements
Before adding a new challenge, notice whether you can:
- Set up an easier version without rushing.
- Continue breathing comfortably.
- Adjust the movement when the effort increases.
- Leave the position deliberately.
These are practical observations, not a universal readiness test. There is no required number of months of practice or specific Plank duration you must complete first.
For example, try a supported hip hinge before unsupported Warrior III. Explore knee-down Side Plank before supporting yourself with both legs extended.
Choose the Skill You Want to Practice
| Practice focus | Poses to explore | Useful starting support |
|---|---|---|
| Standing balance | Warrior III, Half Moon, Eagle | Wall, block, or toes on the floor |
| Trunk control | Boat, Side Plank | Bent knees, grounded feet, or lower knee down |
| Forearm support | Dolphin | Knees bent or remaining on the mat |
| Backbending | Camel | Hands supporting the back of the pelvis |
| Hip movement in a lunge | Lizard | Back knee down and hands on blocks |
If you want more standing options, Yoganiro’s yoga poses for balance guide includes additional supported variations.
Prepare Your Space and Body
Gather Support Before Starting
Keep a nonslip mat, two sturdy yoga blocks, and a folded blanket nearby. Choose a clear wall for supported standing practice, with enough space to step out of a pose.
Place blocks on a stable surface. Use a height that brings the support within comfortable reach without making the block feel unsteady.
Yoganiro’s comparison of 3-inch and 4-inch yoga blocks explains how their dimensions can affect support and handling.
Warm Up for the Movements You Choose
Spend a few minutes exploring familiar movements before trying something more demanding.
For standing balances, begin with gentle weight shifts and shallow knee bends. Before arm-supported poses, explore comfortable movements on hands and knees. Before Camel, practice a small chest lift while standing or kneeling.
Use this time to notice how you feel today. You don’t need an elaborate warm-up or a full sequence before every pose.
Know When to Modify or Stop
Yoga is generally considered safe when practiced appropriately, especially with qualified instruction, but injuries can occur. Pregnancy, existing injuries, balance difficulties, and certain health conditions may require individual adjustments. The National Center for Complementary and Integrative Health’s yoga safety guidance explains these considerations.
Stop if you experience sharp pain, numbness, dizziness, or uncomfortable pressure in a joint. If an injury or health condition affects your movement, ask your healthcare professional and a qualified yoga teacher which variations are appropriate.
8 Intermediate Yoga Poses to Explore
Read the setup and exit before beginning. Start with the easier preparation, and treat the more demanding option as a choice rather than a requirement.
1. Warrior III — Virabhadrasana III
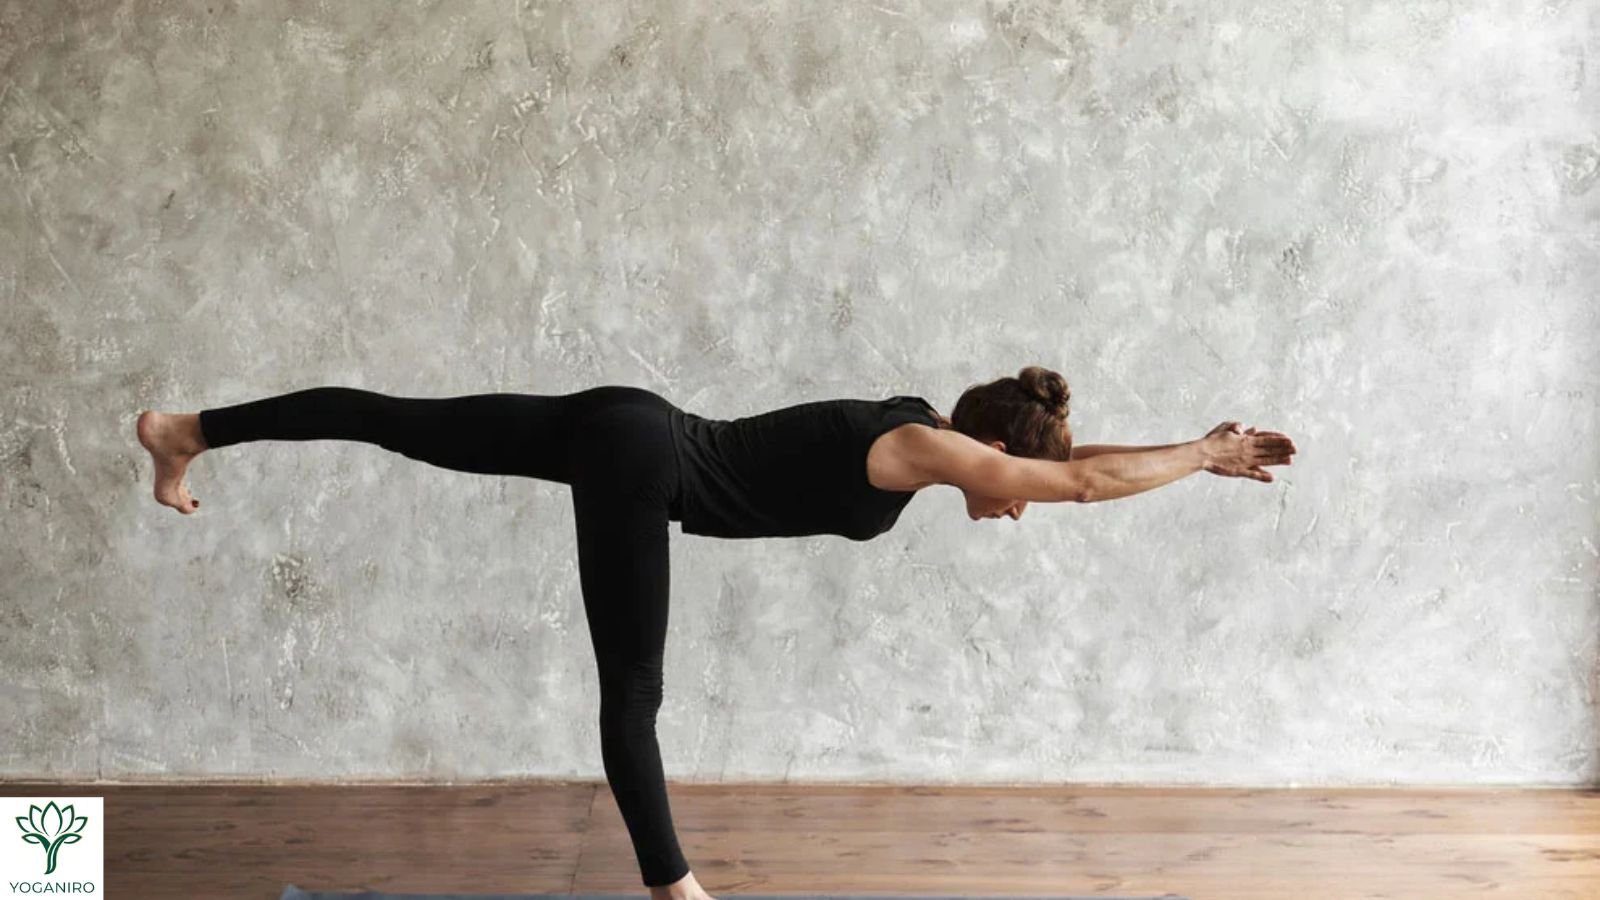
Practice focus: Balancing while your torso and lifted leg move in opposite directions.
Easier preparation: Wall-supported Warrior III
- Face a wall and place your palms against it. Step back enough to hinge forward comfortably.
- Shift weight into your left foot, keeping that knee slightly bent.
- Hinge forward and reach your right leg behind you. Keep the back toes down or lift the foot slightly.
- Keep your pelvis facing the floor. To exit, lower the right foot and stand upright.
Intermediate variation: Unsupported Warrior III
Return to standing before setting up this option.
- Stand with your hands on your hips and shift weight into your left foot.
- Soften your left knee. Hinge forward as your right leg reaches back and lifts.
- Keep your gaze down and your lifted leg at a manageable height.
- To exit, lower the right foot as you bring your torso upright. Repeat on the other side.
Watch for: Locking the standing knee or turning the pelvis open to lift the leg higher.
See Yoga International’s Warrior III instructions for additional alignment guidance.
2. Half Moon — Ardha Chandrasana
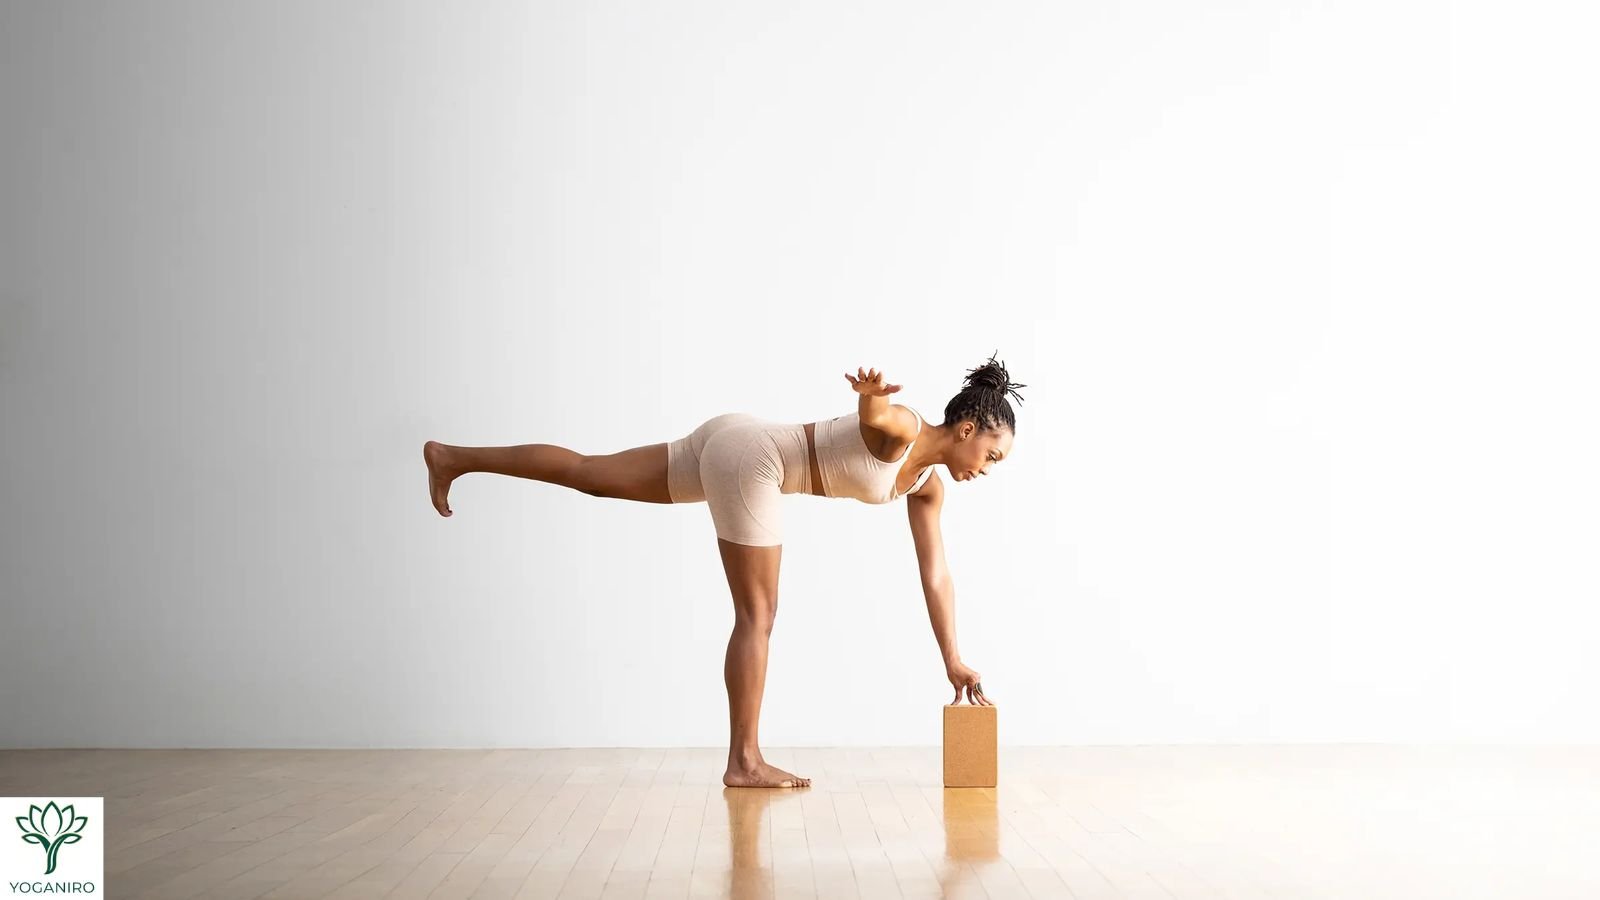
Practice focus: Balancing while turning your chest and pelvis toward the side.
Easier preparation: Keep the back toes grounded while placing the lower hand on a block.
Intermediate variation: Lift the back foot while retaining block support.
- Begin in a short lunge with your right foot forward.
- Place a block ahead of and slightly outside your right foot. Rest your right hand on it and your left hand on your hip.
- Shift weight into your right foot. Keep the left toes grounded until you feel steady.
- Lift the left foot and gradually straighten the standing leg without locking the knee.
- Turn your chest and pelvis toward the left. Keep looking down and lift the left leg only as high as you can control.
- To exit, bend your right knee and gently lower your left foot into the lunge. Switch sides.
Watch for: Looking upward before your balance feels settled.
Yoganiro’s Triangle Pose guide introduces a related standing shape with both feet grounded.
For further technique, see Yoga Basics’ Half Moon instructions.
3. Eagle — Garudasana
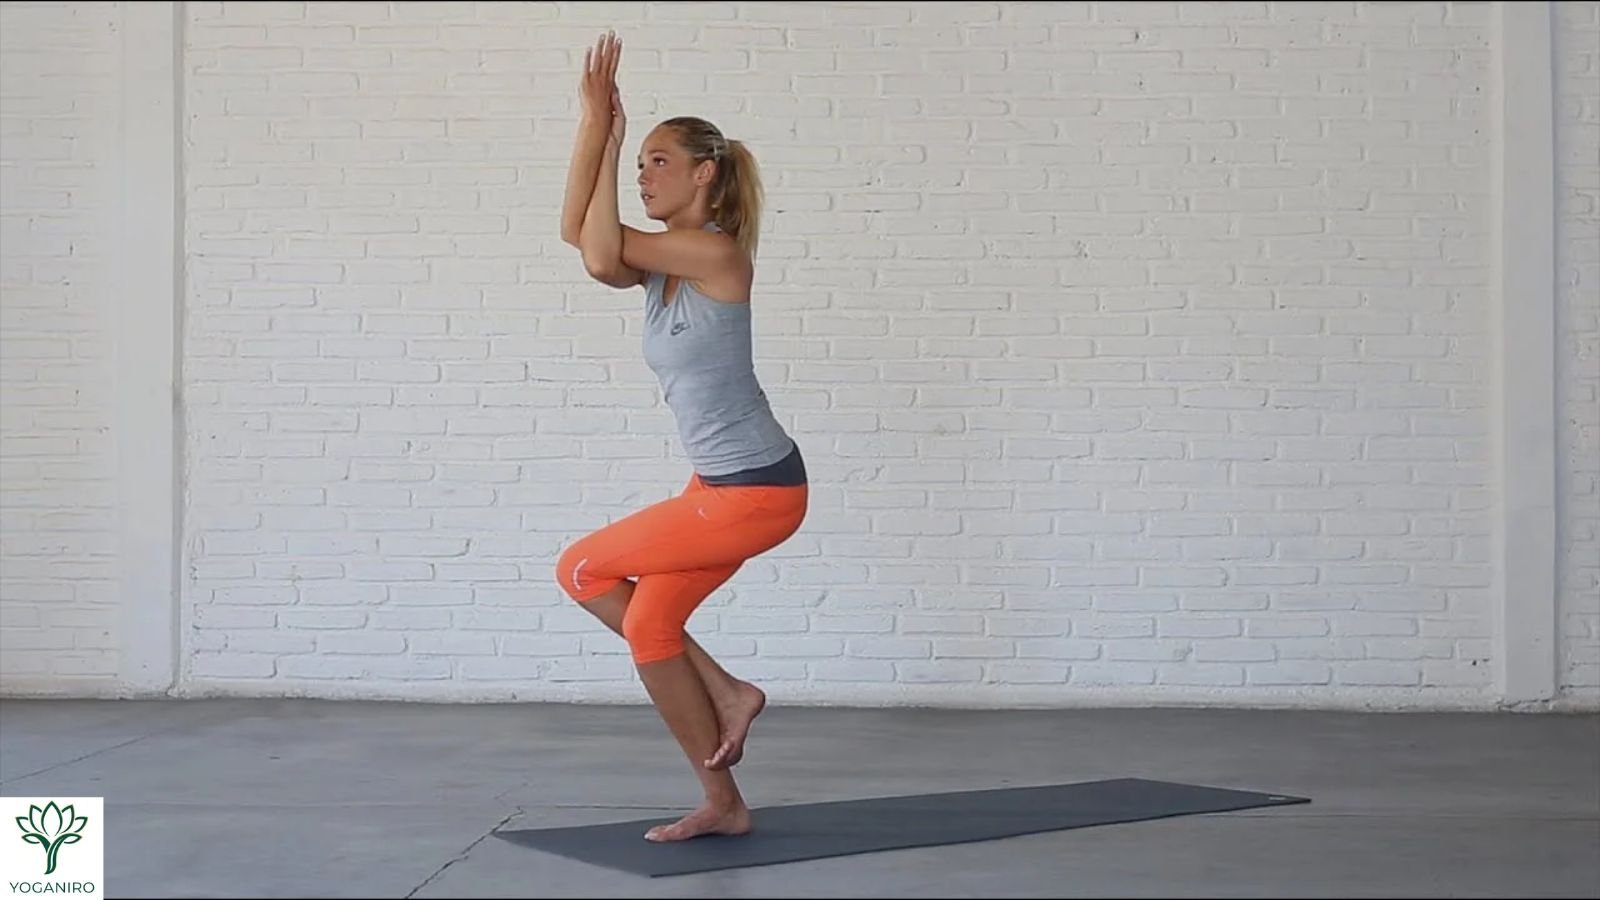
Practice focus: Standing balance with coordinated arm and leg positions.
Easier preparation: Keep the crossed foot’s toes on the floor and use a self-hug.
Intermediate variation: Lift the crossed foot and add the arm position if comfortable.
- Stand near a wall and bend both knees slightly.
- Shift weight into your left foot. Cross your right thigh over your left.
- Rest your right toes on the floor beside your left foot, or lift them if you feel steady.
- Cross your left arm over your right in a self-hug.
- If comfortable, bend your elbows and bring the backs of your hands toward each other. Keep your shoulders relaxed.
- To exit, release your arms, uncross your legs, and stand upright. Switch sides.
Watch for: Forcing your foot around the calf or pushing your palms together. Neither wrap is necessary.
Practice the arms and legs separately if combining them feels confusing. See Yoga International’s step-by-step Eagle guide for more detail.
4. Boat — Navasana
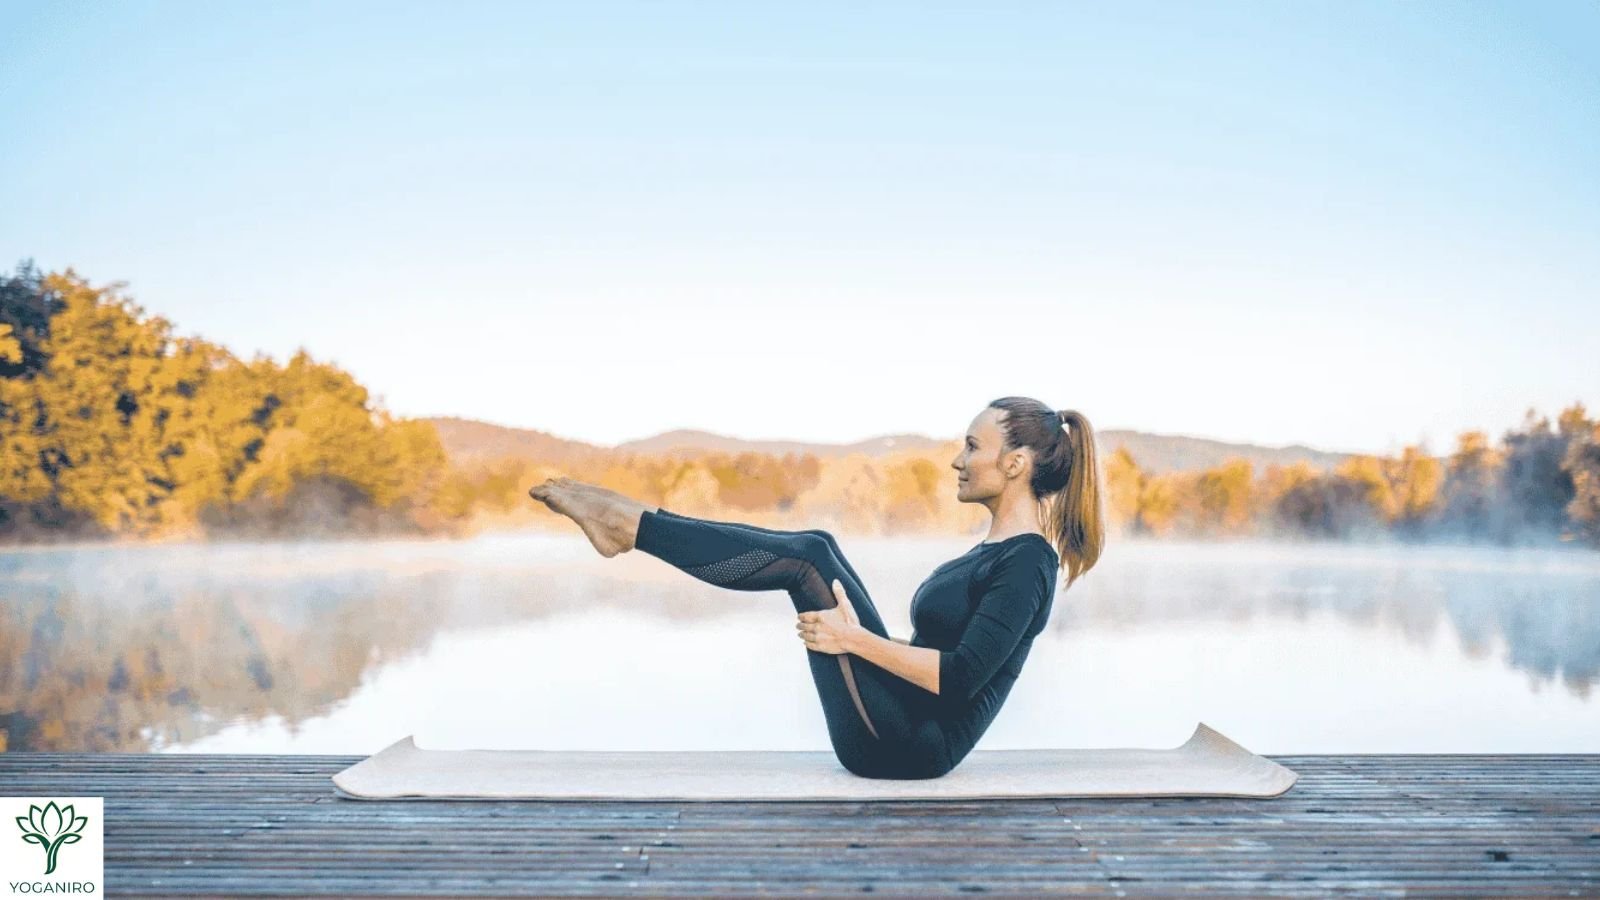
Practice focus: Maintaining a steady seated position as your feet become lighter or lift.
Easier preparation: Keep both feet down and hold behind your thighs.
Intermediate variation: Lift the feet with bent knees, optionally extending the legs.
- Sit with your knees bent and feet flat on the mat.
- Hold behind your thighs and lift your chest.
- Lean your torso back slightly without collapsing through your lower back.
- Lift one foot, then the other, keeping your knees bent.
- Stay here, or release your hands and reach your arms forward. Extend your legs only if you can maintain the same controlled position.
- To exit, place your feet down and return to an upright seat.
Watch for: Pulling hard with your arms or rounding farther as you straighten your legs. Keep your knees bent or return your feet to the floor.
The Queensland Government’s Boat Pose instructions provide a bent-knee starting approach.
5. Side Plank — Vasisthasana
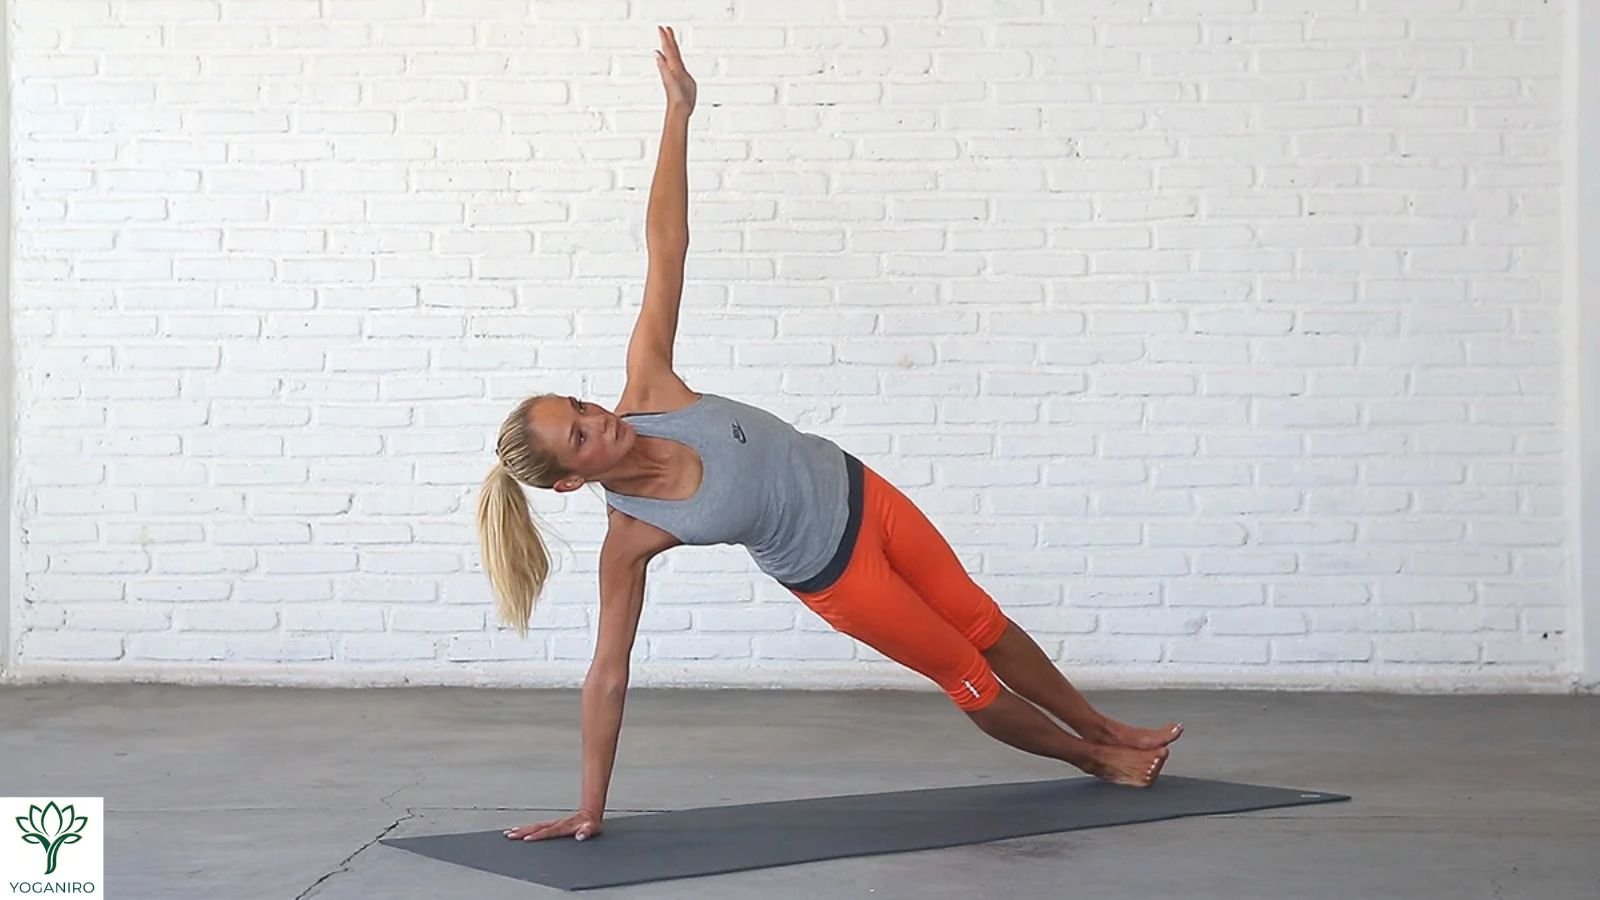
Practice focus: Supporting your body sideways while keeping your trunk steady.
Easier preparation: Knee-down Side Plank
- Start on hands and knees, with your right hand beneath your right shoulder.
- Keep your right knee down and extend your left leg behind you.
- Turn your chest left, placing the inner edge of your left foot on the floor. Rest your left hand on your hip.
- Press through your right palm and keep your waist lifted.
- Return your left hand and knee to the mat. Repeat on the other side.
Intermediate variation: Full Side Plank
Return to all fours and rest before setting up this separate option.
- Enter Plank with your shoulders over your wrists.
- Roll onto the outer edge of your right foot and turn your chest left.
- Keep your left foot slightly forward on the floor for support, or stack it over your right.
- Place your left hand on your hip.
- Return your left hand to the mat, turn back into Plank, and lower your knees.
Watch for: Sinking into the supporting shoulder or wrist discomfort.
See YogaEasy’s Side Plank guide for supporting variations.
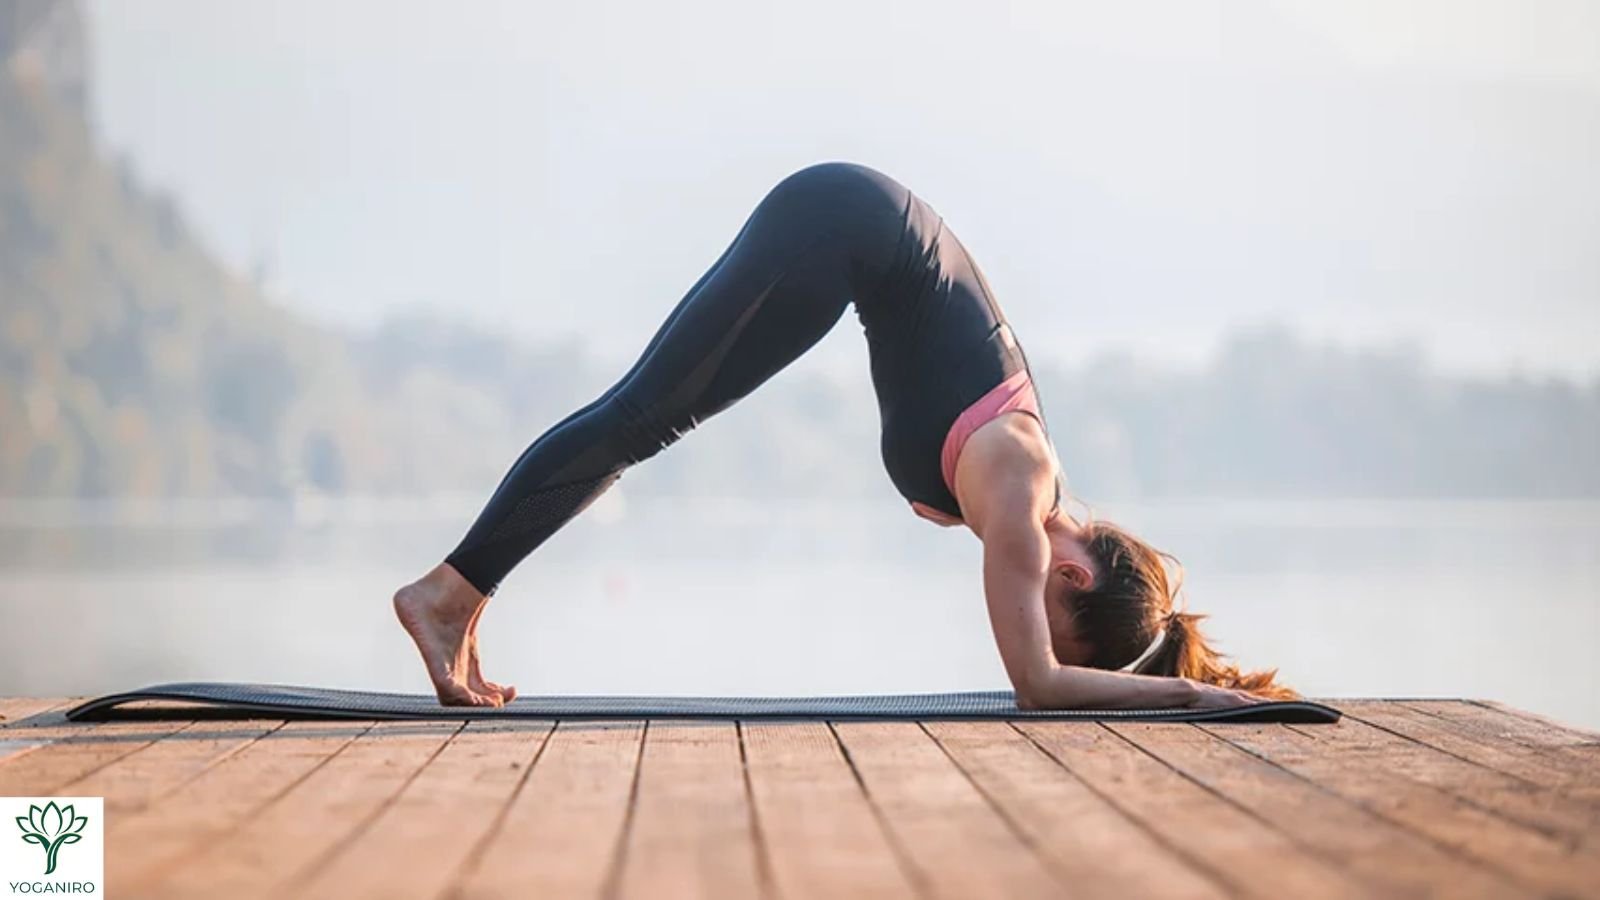
6. Dolphin — Ardha Pincha Mayurasana
Practice focus: Supporting your upper body through your forearms.
Easier preparation: Remain on forearms and knees while gently pressing the floor away.
Intermediate variation: Lift the knees and hips, keeping the knees bent as needed.
- Start on hands and knees, then lower your forearms to the mat.
- Position your elbows beneath your shoulders, with forearms parallel and palms down.
- Tuck your toes and lift your knees, sending your hips up and back.
- Keep your knees bent enough to maintain length through your back.
- Press your forearms down and keep your head off the floor.
- To exit, lower both knees and settle into a comfortable resting position.
Watch for: Elbows sliding apart or weight collapsing toward your head. End the attempt if you cannot maintain forearm support.
Avoid this pose with a shoulder injury unless your care professional has advised an appropriate variation. See YogaEasy’s Dolphin instructions and precautions.
7. Camel — Ustrasana
Practice focus: Exploring a kneeling backbend with a controlled chest lift.
Easier preparation: Keep your hands supporting the back of your pelvis and use a small range.
Intermediate variation: Reach toward your heels only when you can maintain comfortable control.
- Kneel with your knees about hip-width apart. Place a folded blanket underneath them if helpful.
- Rest your hands on the back of your pelvis.
- Press your shins down and lengthen upward through your torso.
- Lift your chest and begin a small backward arc. Keep your head in a comfortable position.
- Remain with hands on your pelvis, or reach toward your heels without dropping abruptly backward.
- To exit, return your hands to your pelvis if needed. Press your shins down and slowly lift your torso upright.
Watch for: Pinching in your lower back or throwing your head backward. Reduce the range or leave the pose.
See Yoga International’s Camel Pose guide for additional setup guidance.
8. Lizard — Utthan Pristhasana
Practice focus: Exploring hip movement in a wide lunge.
Easier preparation: Keep the back knee down and place your hands on blocks.
Intermediate variation: Lift the back knee while maintaining a steady lunge.
- Begin in a kneeling lunge with your right foot forward.
- Place both hands inside your right foot. Move that foot slightly outward to create space.
- Keep your front knee pointing in the same direction as your toes, approximately over the ankle.
- Pad your back knee and raise your hands onto blocks as needed.
- Stay here, or tuck your back toes and lift the back knee. Keep breathing comfortably.
- To exit, lower your back knee, return your hands to the floor, and bring your right knee back to all fours. Switch sides.
Watch for: Forcing your forearms down or allowing your front knee to collapse inward. Keep your hands elevated if that gives you better control.
See Yoga International’s Lizard modifications for further options.
How to Combine a Few Poses Into a Practice
A Suggested 15–20-Minute Session
This is a flexible practice idea, not a researched treatment program. The times include setup, brief attempts, transitions, and breaks—not continuous holds.
| Part of the session | Suggested activity | Approximate time |
|---|---|---|
| Arrive and warm up | Comfortable breathing, weight shifts, and gentle familiar movements | 4 minutes |
| Standing balance | Wall-supported Warrior III on both sides | 4 minutes |
| Trunk control | Bent-knee Boat with feet-down breaks | 3 minutes |
| Hip movement | Supported Lizard on both sides | 4 minutes |
| Settle | Comfortable seated or lying rest | 2–3 minutes |
The suggested activities total about 17–18 minutes, leaving a little flexibility within a 15–20-minute session.
Begin with one brief attempt at each pose. Repeat if you still feel comfortable and can maintain control.
On another day, substitute Eagle for Warrior III or knee-down Side Plank for Boat. Change one unfamiliar element at a time so you can notice how it feels.
For a quiet ending, explore Yoganiro’s meditation for beginners guide.
Adjust the Session to Your Needs
Your two sides may need different amounts of support. Use a taller block, a smaller movement, or a shorter attempt where helpful.
If you have less time, choose one standing balance and one floor pose, then rest. If a pose feels unfamiliar, spend the session learning its setup and exit.
Repeating a comfortable variation can reveal useful details: where you tend to rush, when your breathing changes, or which support helps you feel steadier.
Common Difficulties and Useful Adjustments
| What you notice | What to try |
|---|---|
| You wobble before settling into a standing balance. | Return to a supported preparation, keep your gaze still, and lift the foot only slightly. |
| You hold your breath as the effort increases. | Reduce the range, add support, or come out for a break. |
| Your lower back rounds as you extend your legs in Boat. | Bend your knees and hold behind your thighs, or place your feet down. |
| The floor feels too far away in Half Moon or Lizard. | Bring the surface closer with stable blocks. |
| Your wrist hurts in Side Plank. | Stop the pose and choose a movement that doesn’t load that wrist. |
| One side feels less steady. | Give that side extra support rather than forcing matching shapes. |
| You feel rushed when leaving a pose. | Rehearse the exit from the easier preparation before adding difficulty. |
Frequently Asked Questions
Can I practice intermediate yoga poses at home?
You can explore familiar, supported variations at home when you have enough clear space and understand how to enter and leave them. For movements that feel confusing or unstable, a qualified yoga teacher can help you choose an appropriate setup.
Begin with a small selection rather than trying every unfamiliar pose in one session.
How long should I hold each pose?
For an initial attempt, try two or three comfortable breaths, or less if needed. This is a practical starting suggestion, not a required duration.
Come out sooner if your breathing becomes strained or you lose control. A longer hold is optional.
Do I have to stop using props to become intermediate?
No. A wall or block can help you focus on a particular action, such as keeping your pelvis steady or turning your chest without losing balance.
You can explore a new challenge while retaining support elsewhere.
Do I need to learn Headstand or Crow?
No. Neither is required for this guide or for a satisfying yoga practice. Standing balances, supported backbends, and the variations described here offer plenty to explore.
Choose your next step according to your interests, comfort, and ability to control the movement.
Final Thoughts
Intermediate yoga poses give you new movements to explore without requiring dramatic shapes. Choose two poses that interest you, begin with their easier preparations, and practice entering and leaving them smoothly.
For your next session, try wall-supported Warrior III and bent-knee Boat. Notice which adjustments help you feel steady and breathe comfortably. Use those observations to decide what to practice next.

Yoganiro was founded by Abdul Rehman with a passion for yoga, wellness, and mindful living. The goal behind Yoganiro is to inspire people through simple yoga practices, wellness tips, and healthy lifestyle content that promotes balance, peace, and overall well-being.
1 thought on “Intermediate Yoga Poses: 8 Poses With Clear Steps and Modifications”