

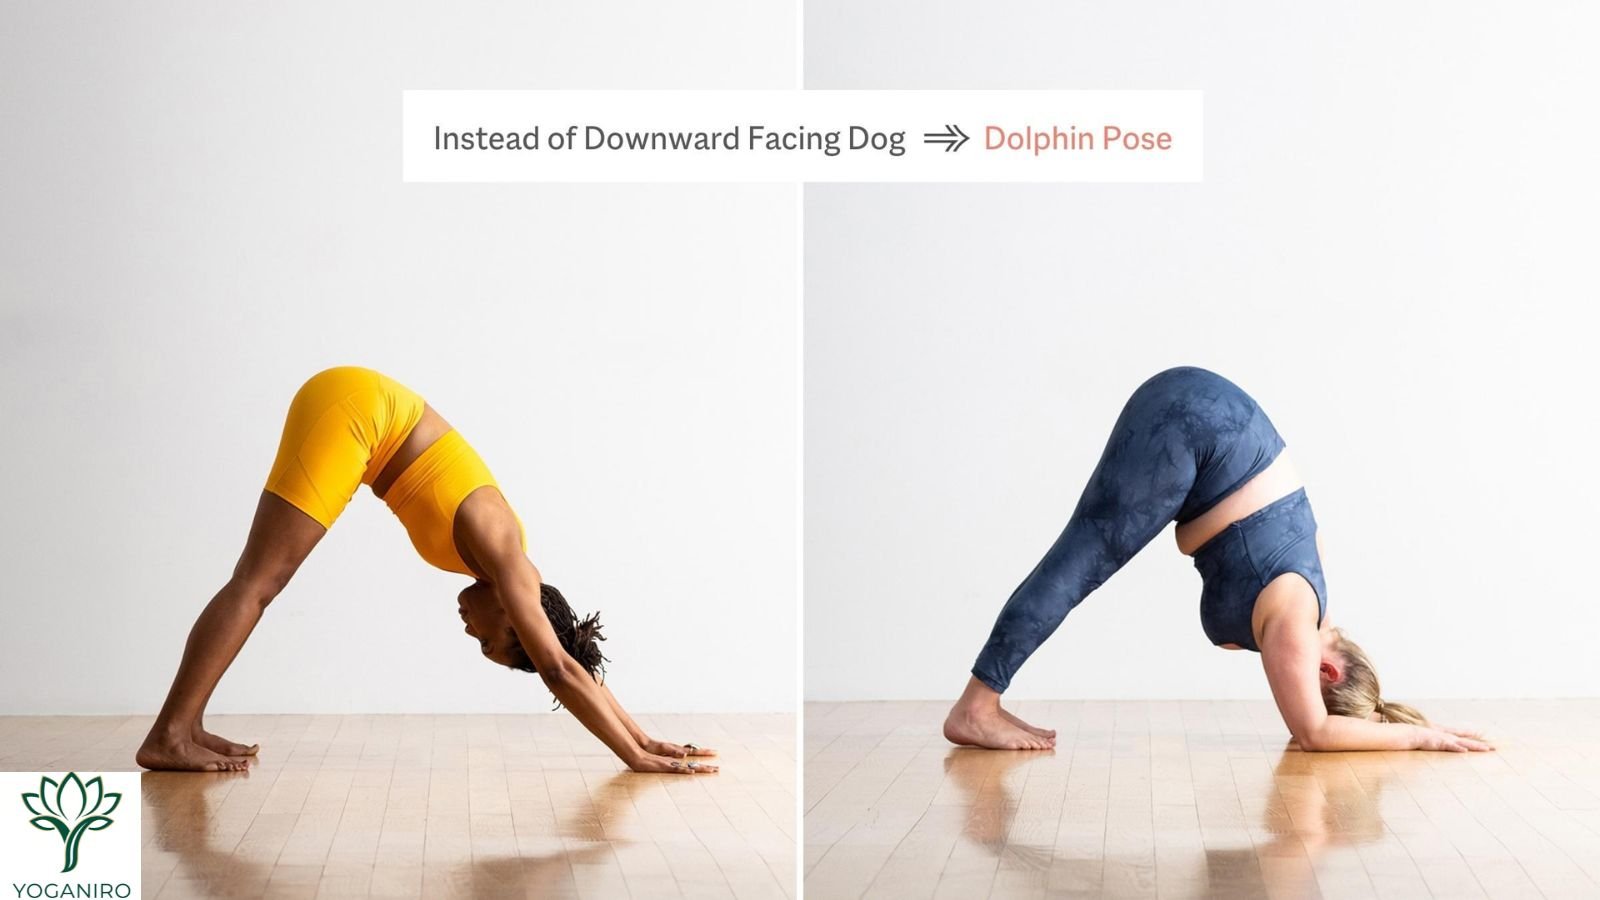
When comparing Dolphin vs Downward Dog, look at the arms first. In Downward Dog, your hands press into the mat and your elbows extend. In Dolphin, your elbows bend and your forearms press down. That small change explains something you might notice in class: Dolphin can feel more comfortable at your wrists while asking more of your shoulders.
Quick answer: If you’re learning to lift your hips and lengthen your back, start with Downward Dog at a wall or on the mat with bent knees. If you want to practice supporting yourself on your forearms, start with Dolphin preparation and keep your knees down. If either position hurts, come out. You can choose a different pose altogether.
Dolphin vs Downward Dog: 5 Key Differences
| What to compare | Downward-Facing Dog | Dolphin Pose |
|---|---|---|
| 1. What supports you | Your hands and feet contact the mat. | Your forearms and feet provide support; your hands also touch the mat. |
| 2. How you use your arms | Your elbows extend as you push through your hands and reach your hips back. | Your elbows stay bent as you press along your forearms and keep your head clear of the floor. |
| 3. How your wrists are positioned | Your wrists bend backward while your palms bear some of your weight. | Your wrists need less backward bend because the forearms share the support. |
| 4. What the pose helps you practice | Moving the hips back from grounded hands and finding a position you can use between movements in a flow. | Maintaining forearm support as the hips rise, an action also used in preparation for forearm balances. |
| 5. How to make it easier | Keep your knees bent or place your hands on a wall. | Keep your knees on the mat while learning the arm position, or take a shorter hold. |
Both poses ask the upper body to work, and both can produce a stretch along the backs of the legs. The difference becomes clearer when you consider what you want to learn: pressing through your hands in Downward Dog, or keeping your shoulders lifted over a forearm base in Dolphin. health.clevelandclinic.org
Which Pose Should You Try First?
Choose Downward Dog if you want to learn the hip movement
The part beginners often miss in Downward Dog is the backward movement. It’s possible to lift your knees and send your hips straight up while most of the effort still feels concentrated in your arms. At a wall, the direction is easier to understand: your palms stay in place while your hips travel away from them.
That’s a useful starting point if floor Downward Dog feels like a struggle to get your heels down. At the wall, your heels are already grounded. You can give your attention to the hinge at your hips, then recognize that movement when you return to the mat.
Choose Dolphin if you want to learn forearm support
Dolphin is useful when you want to feel how pressing your forearms down helps keep your chest and head lifted. Try this with your knees on the mat first. Notice the difference between resting passively on your elbows and pressing through the length of both forearms. If you can feel that difference, the preparation has already served a purpose.
A teacher may introduce Dolphin before Forearm Stand, but Dolphin is a complete pose in its own right. You can practice it with both feet grounded for as long as you like. Holding it for a certain number of breaths is not a test that clears you for an inversion.
If Downward Dog feels uncomfortable at the wrists
First, distinguish wanting a different wrist position from having pain that needs attention. Dolphin changes how the upper body meets the floor. It doesn’t guarantee that an irritated wrist, elbow, or shoulder will feel better. If pain is the reason you came out of Downward Dog, there’s no need to test another weight-bearing pose immediately.
If you simply want to take your hands and forearms off the floor, an upright pose may fit your goal better. For example, Mountain Pose and shallow Chair Pose let you continue a standing practice without leaning on your arms. If you were looking for a leg stretch rather than arm work, Triangle Pose with the lower hand supported offers another way to explore it.
Before You Practice
Choose a spot where the mat lies flat and you have room to lower both knees. If your mat bunches or travels as you press into it, come out before adjusting it. Yoganiro’s guide to stopping a yoga mat from slipping on carpet helps distinguish a moving mat from hands sliding on its surface. The distinction matters here: changing your arm position won’t fix a mat that moves underneath you.
Warm up with a little comfortable movement. Stop if you feel pain, numbness, or dizziness. If you have a wrist, shoulder, or neck injury, ask a healthcare professional familiar with your condition whether either floor pose is appropriate.
If you have glaucoma or have been advised to avoid head-down positions, ask your eye care professional before trying these poses. A study of eye pressure in four yoga positions found a temporary rise during Downward Dog in participants with and without glaucoma. It did not test Dolphin or determine the long-term effects on glaucoma. Switching to your forearms still leaves your head down. pubmed.ncbi.nlm.nih.gov
How to Do Downward-Facing Dog
Difficulty: Foundational on the floor; beginner preparation at the wall. These labels describe the versions below. A foundational pose can still feel demanding, especially if it’s unfamiliar.
Wall Downward Dog: Learn the shape
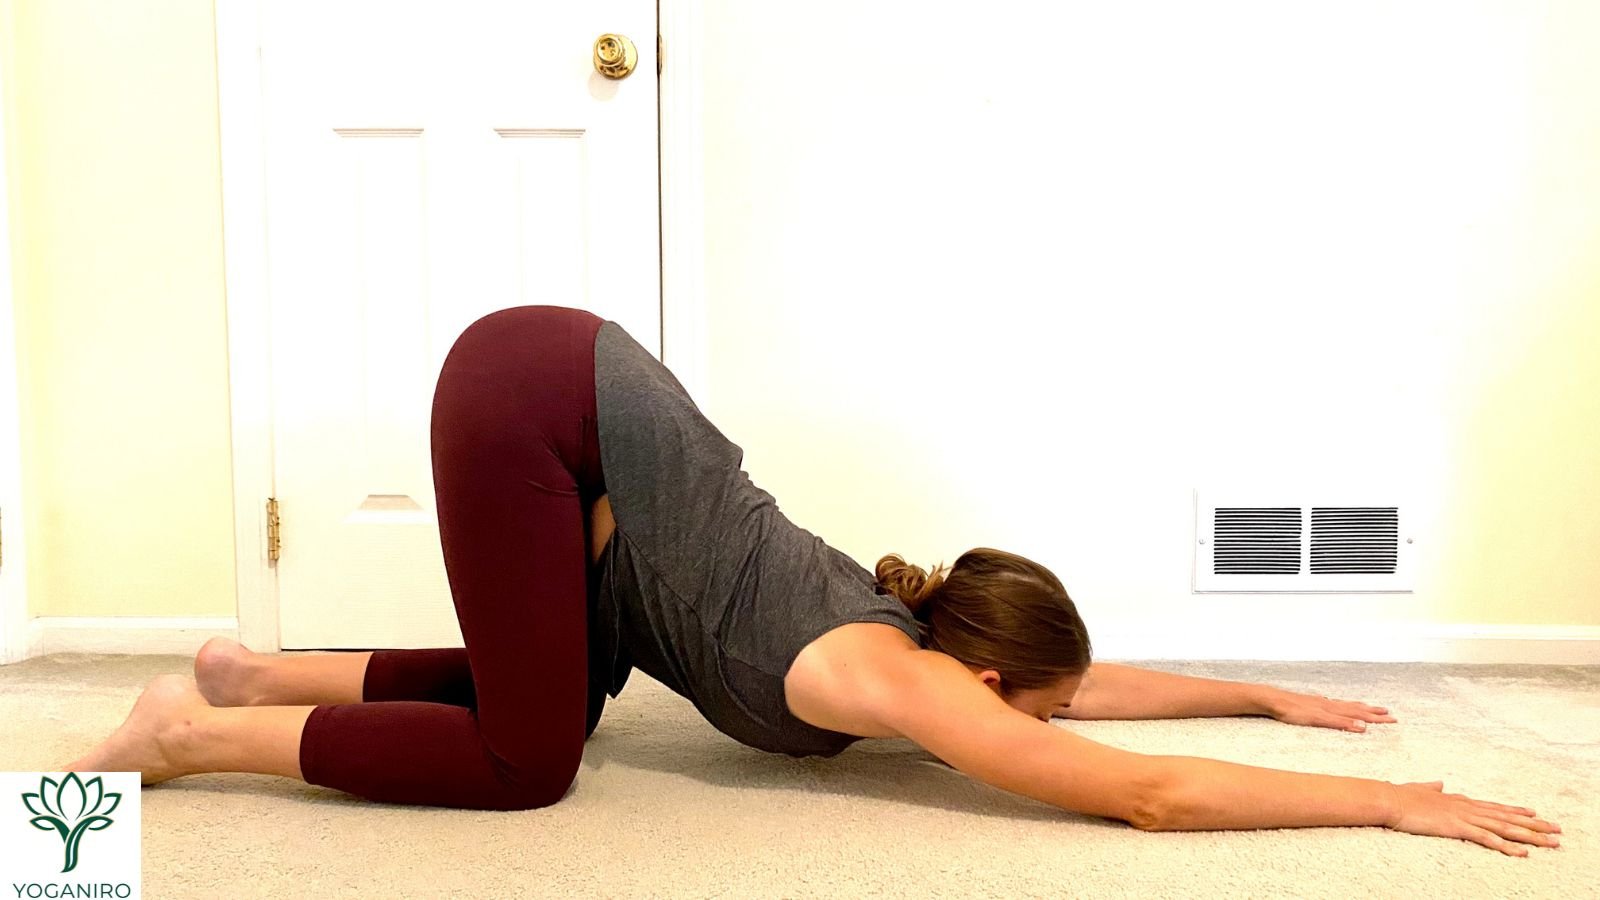
- Face a clear wall. Stand with your feet about hip-width apart. Place your palms against the wall about shoulder-width apart at a comfortable height near your shoulders.
- Step back and hinge. Take small steps backward. Soften your knees and let your hips move back as your chest lowers between your arms.
- Choose your depth. Walk your hands a little lower if comfortable. Stop where you can keep your neck in line with your back and breathe easily. You don’t need to bring your torso parallel to the floor.
- Return to standing. Step toward the wall as you lift your torso. Take your hands away once you’re upright and steady.
The wall version is particularly useful if getting down to the floor is difficult. It still involves pressure through your hands, so don’t assume it will suit a painful wrist. Cleveland Clinic’s Downward Dog guide describes both wall and floor variations. health.clevelandclinic.org
Floor Downward Dog: Step by step
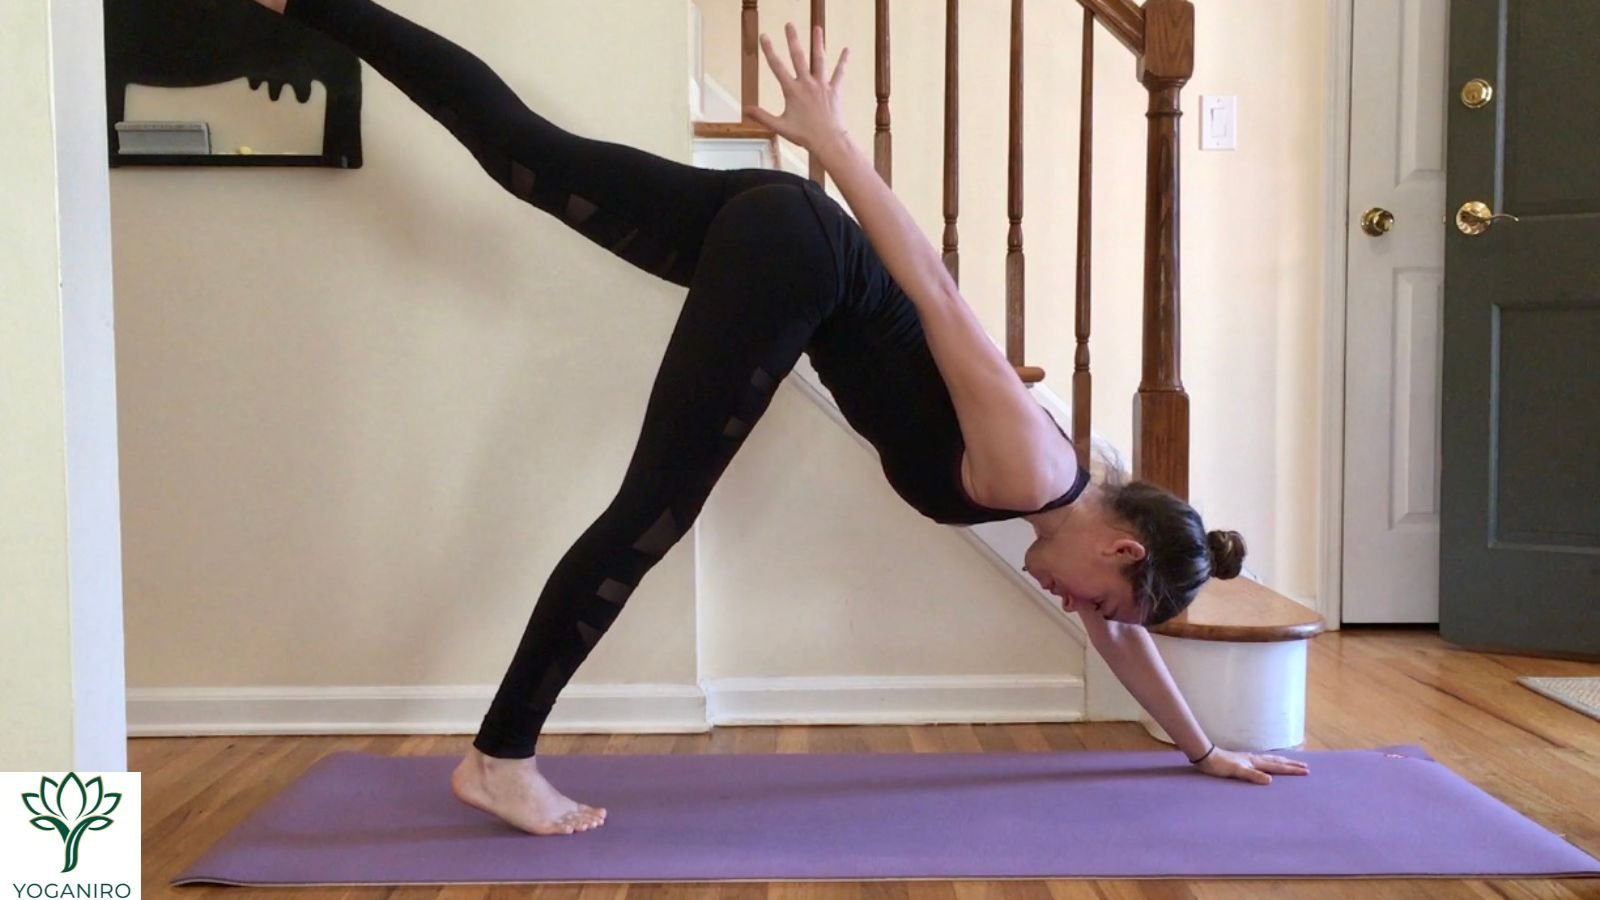
- Start on hands and knees. Place your hands about shoulder-width apart and your knees about hip-width apart. Spread your fingers comfortably.
- Lift with bent knees. Tuck your toes, press into your hands, and lift your knees a little. Send your hips up and back.
- Reach your hips away from your hands. Keep your arms active and allow your head to settle between your upper arms. Let your gaze fall toward the mat or your legs rather than lifting your chin to look ahead.
- Adjust one thing at a time. First, find a comfortable back position with your knees bent. Then, if you like, straighten your legs a little. If your back rounds or your hips move forward, return to the knee bend that gave you more space.
- Come out deliberately. Bend both knees and lower them to the mat. Rest on all fours or choose another comfortable position.
A useful first attempt: Stay for one or two easy breaths, then come down while you still feel in control. This is a practice suggestion, not a minimum hold. Keeping your heels lifted throughout is fine.
How to Do Dolphin Pose
Difficulty: Beginner preparation with the knees down; intermediate with the knees lifted. The key difference between these versions is whether your knees leave the floor. You can practice full Dolphin with bent legs.
Knees-down Dolphin: Find your forearm base
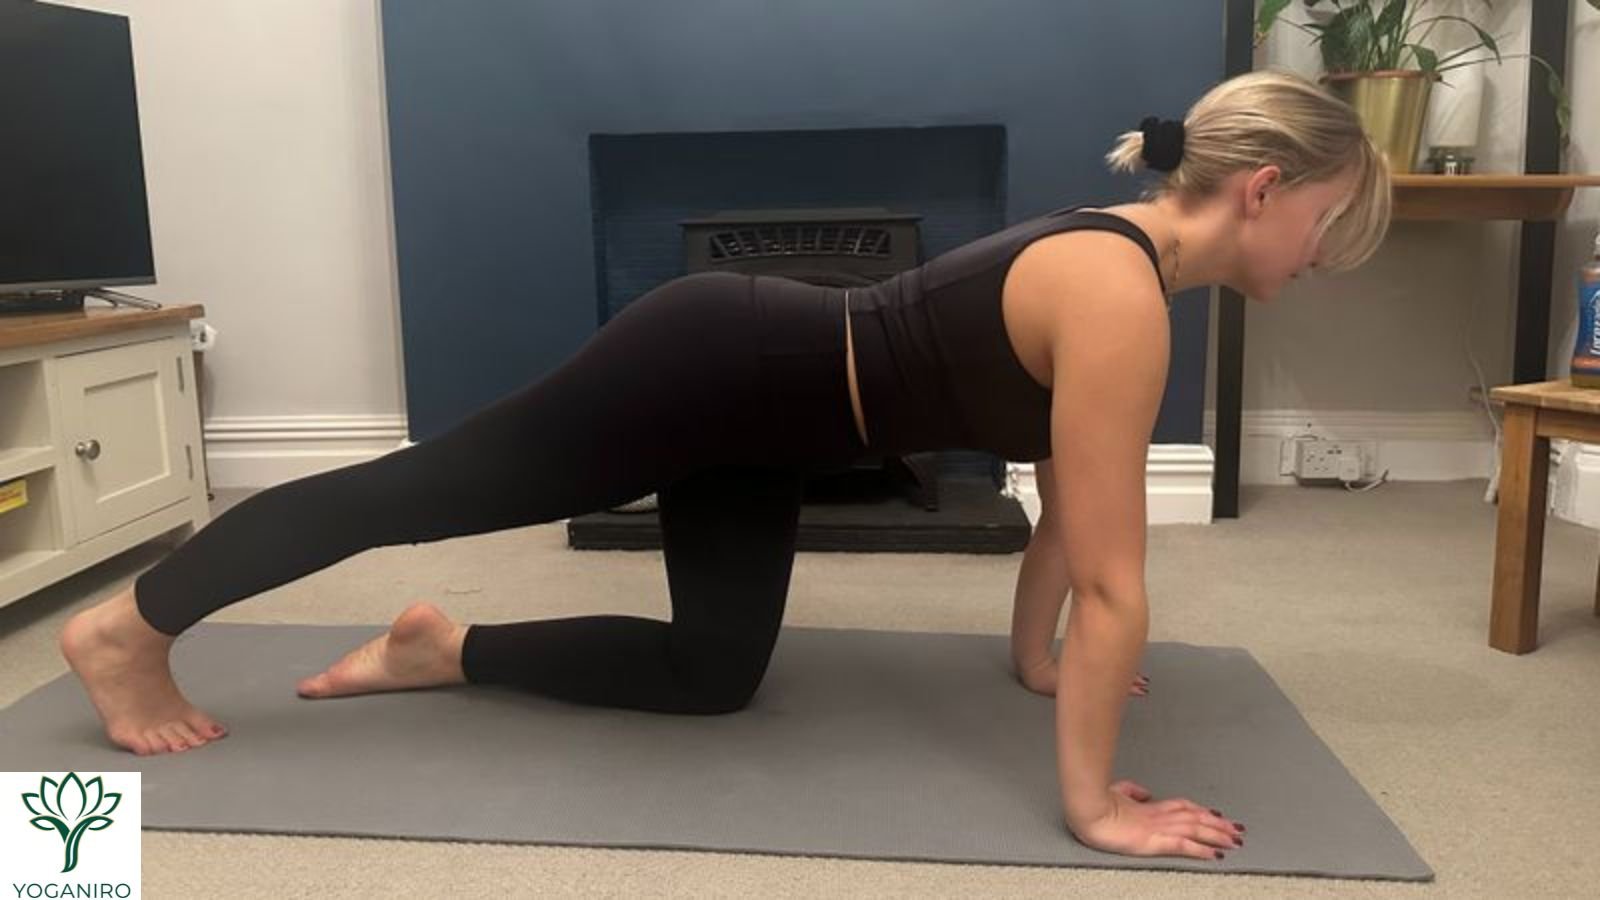
Begin on hands and knees. Lower your forearms one at a time, starting with your elbows under your shoulders and about shoulder-width apart. Place your palms down with your hands pointing forward.
Leave your knees grounded. Gently press the length of both forearms into the mat and notice your upper back lift away from it. Your head stays clear of the floor. If the effort is already strong, practice just this part. To finish, ease your hips back enough to lighten your arms before lifting them from the mat.
This guide uses parallel forearms. You may also see teachers demonstrate Dolphin with interlaced fingers. Both are recognized setups, as shown in YogaEasy’s Dolphin Pose instructions. Choose your hand position while your knees are down rather than rearranging your arms mid-hold. www.yogaeasy.com
Full Dolphin: Step by step
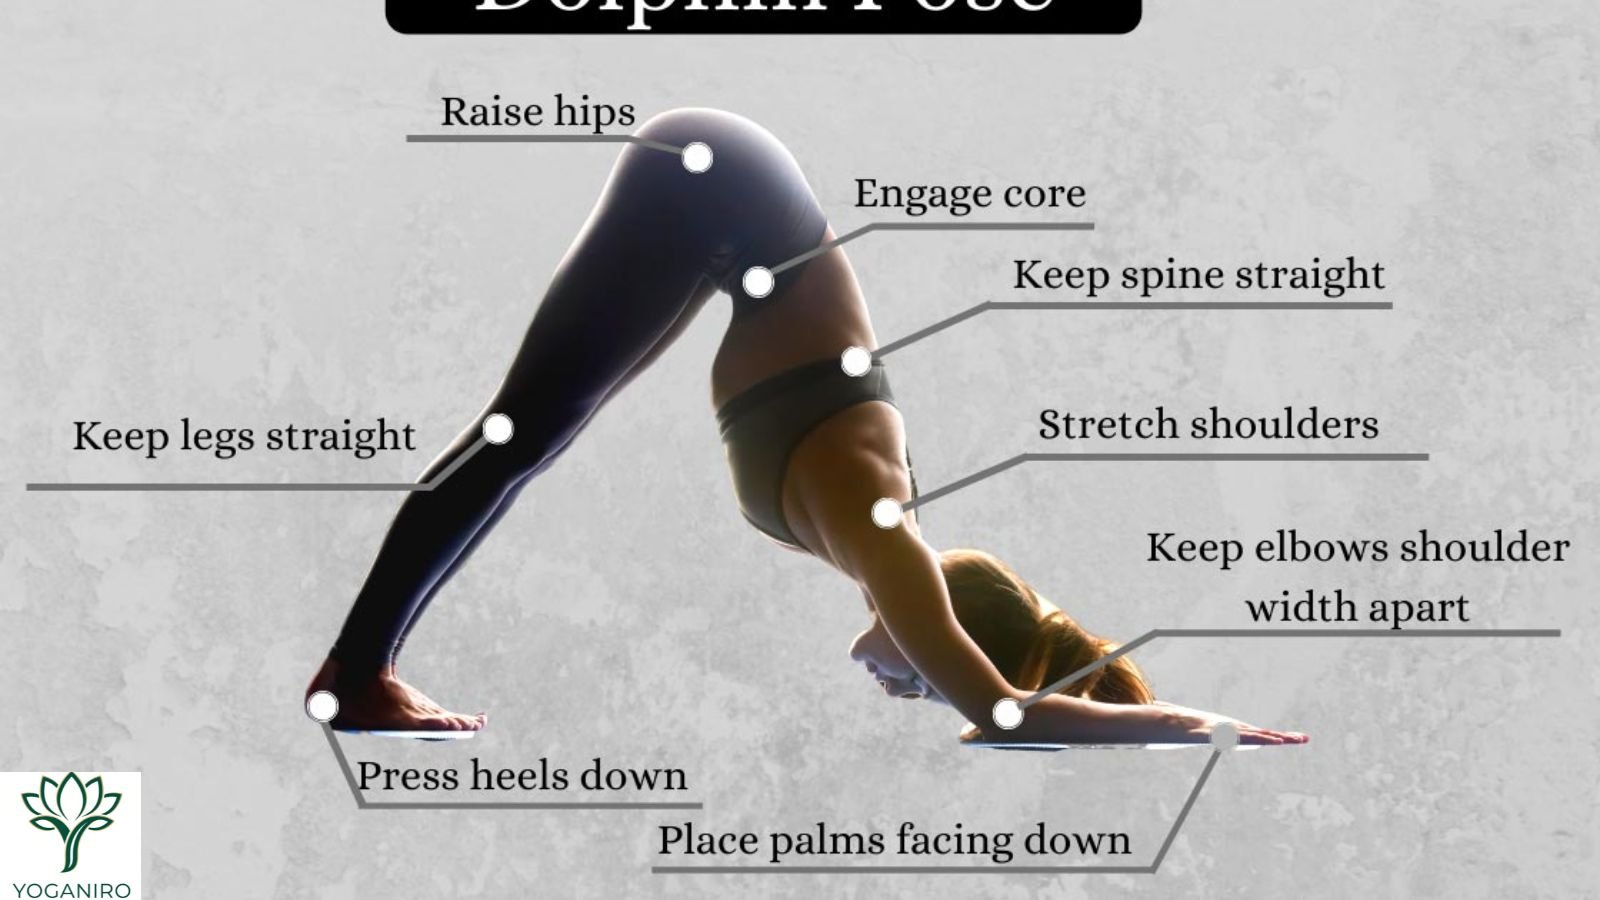
- Settle your forearms. Begin in the knees-down preparation. Check that your elbows feel steady and that you can press down without discomfort.
- Lift your knees. Tuck your toes and send your hips up and back. Keep a bend in your knees as you find the position.
- Leave room between your head and the floor. Press through both forearms. Your head stays between your upper arms without bearing weight. There is no need to walk your feet closer just because your head is farther from the floor than someone else’s.
- Choose a manageable hold. Try a comfortable breath or two. If your elbows drift or your head starts to sink, lower your knees rather than trying to finish a breath count.
- Release the arms after the knees land. Once your knees are grounded, move your hips slightly back. Then return to hands and knees or rest in a position that feels comfortable.
Dolphin often looks more impressive with straight legs. Yet if straightening them pulls your back into a rounded shape or leaves you crowding your head between your arms, bent knees give you a better opportunity to practice the forearm work you came for.
Common Mistakes and What to Try Instead
| What you notice | What to try |
|---|---|
| Your back rounds when you lower your heels. | Let your heels rise again and bend your knees. See whether your hips can move back more comfortably. |
| You look forward to check your reflection. | Check your position before lifting. During the pose, let your head follow the line of your upper body. |
| Dolphin feels cramped after you walk your feet forward. | Lower your knees and reset. On the next attempt, keep your feet farther from your elbows. |
| Your elbows slide outward or your head approaches the mat. | End the hold. Return to the knees-down preparation instead of dragging your elbows inward while they bear weight. |
| Downward Dog feels tiring when the class calls it a rest. | Lower your knees and take an actual rest. You can rejoin at the next comfortable movement. |
One helpful way to compare Dolphin vs Downward Dog is to pay attention to the exit. If you can lower your knees smoothly, you chose a manageable attempt. If you feel you have to drop out suddenly, try an easier version or finish earlier next time. There’s no useful prize for holding the pose through the teacher’s last count.
How to Switch Poses During a Yoga Class
Dolphin can substitute for Downward Dog in some situations. What comes next in the sequence matters. If the teacher is pausing in Downward Dog, you may have time to set up Dolphin and take a breath. If the next cue is “step your right foot between your hands,” a forearm base leaves you in a different starting position.
For an unhurried switch, use this sequence:
- From Downward Dog, bend your knees and lower them to the mat.
- Lower your forearms and establish your Dolphin setup before lifting your knees again.
- To switch back, lower your knees first. Shift your hips back slightly, then return one hand at a time to the mat.
- Decide from all fours whether to lift into Downward Dog, follow the next suitable cue, or rest.
You don’t need to practice both poses every time. If a class repeatedly returns to Downward Dog and you want another option, a useful question for the teacher is: “Where should I rejoin the flow if I rest during Downward Dog?” That gives you a practical plan for the transition as well as the hold.
Frequently Asked Questions
Is Dolphin better for building strength?
Dolphin gives you a chance to practice supporting your upper body through your forearms. Downward Dog also requires active arms and shoulders. A stronger sensation in Dolphin tells you about your effort in that position; it doesn’t establish that Dolphin builds strength faster. Choose according to the skill you want to practice. www.learnyoga.net
What’s the difference between Dolphin and Forearm Plank?
Look at your hips. In Dolphin, they lift up and back, forming an inverted V. In Forearm Plank, your legs reach backward and your trunk stays roughly in line with them. If the teacher cues “hips up,” you’re moving toward Dolphin. If the cue is to lengthen from your head toward your heels in one line, that describes Forearm Plank. www.learnyoga.net
Do I need to master Downward Dog before trying Dolphin?
You don’t need straight legs, heels on the mat, or a long Downward Dog hold before exploring knees-down Dolphin preparation. That preparation lets you learn forearm placement without committing to the full pose. If lifting your knees makes you lose support or brings your head toward the floor, stay with the preparation and ask a qualified instructor for feedback.
How long should I hold each pose when comparing them?
For a first comparison, one or two comfortable breaths in each version, with a rest in between, is a reasonable practice suggestion. You don’t need equal holds. Notice which position lets you breathe naturally, maintain support, and come out without rushing. This is a way to explore two movements, not a researched treatment or strength-training program.
Final Thoughts
If you’re undecided, choose the preparation that answers your question. Want to understand the hip lift? Start at the wall. Want to understand forearm support? Keep your knees down and try Dolphin preparation. Learn how to come out before asking yourself to stay longer.
Once you’ve found a variation you can enter and leave comfortably, Yoganiro’s intermediate yoga poses with easier variations offers other ways to build a practice around the movements you enjoy.

Yoganiro was founded by Abdul Rehman with a passion for yoga, wellness, and mindful living. The goal behind Yoganiro is to inspire people through simple yoga practices, wellness tips, and healthy lifestyle content that promotes balance, peace, and overall well-being.