

By the Yoganiro Editorial Team · Last Updated: August 2026
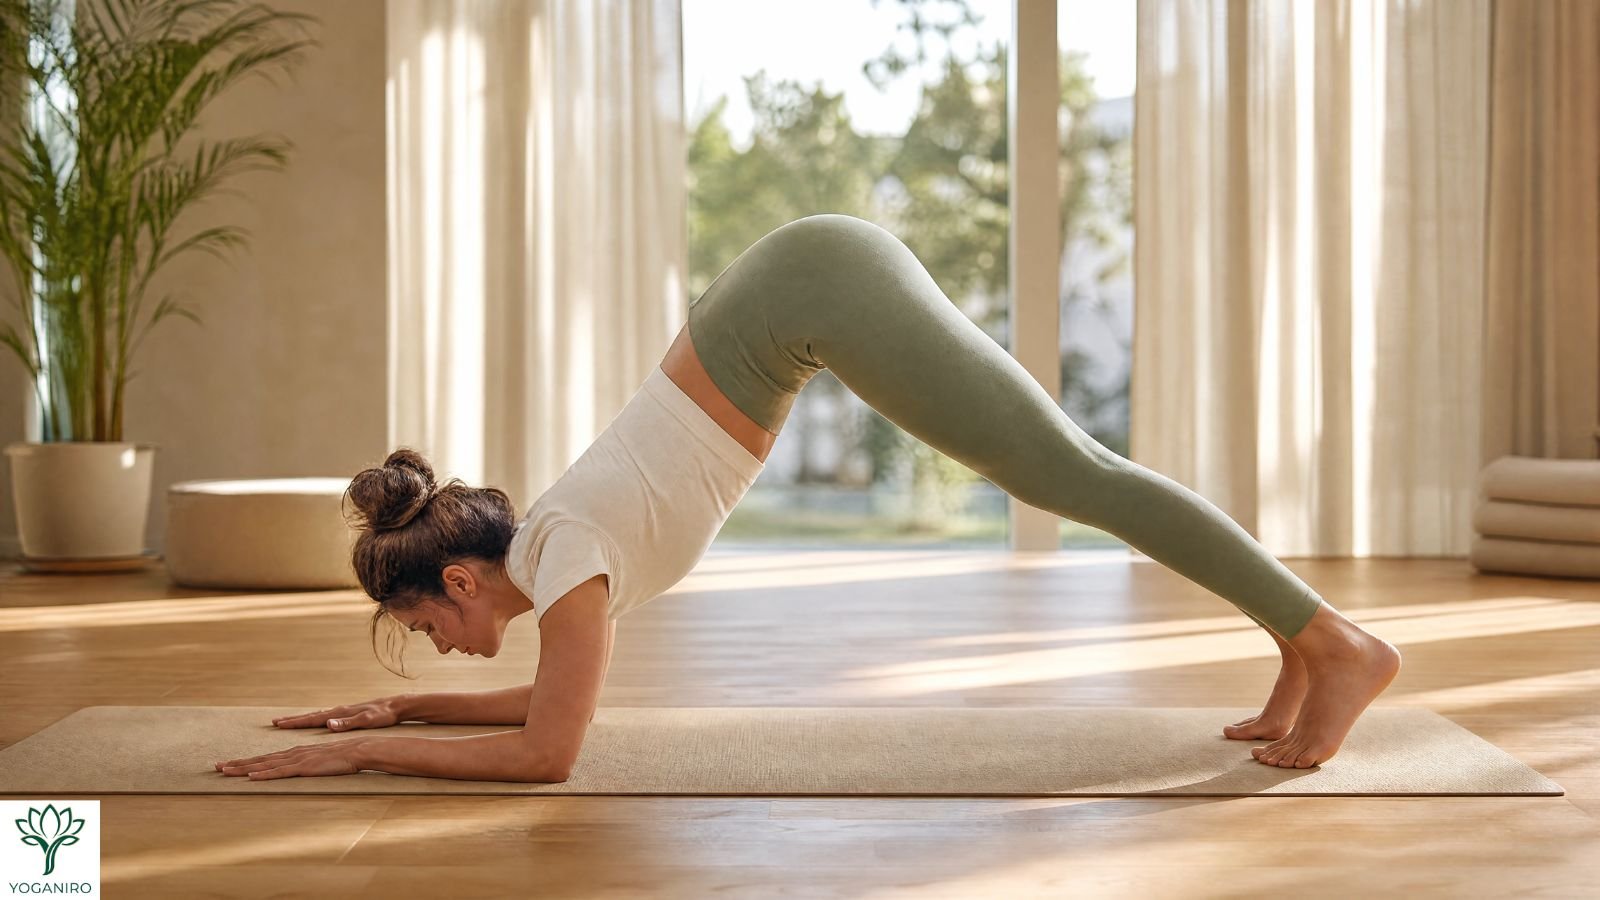
There’s a moment in dolphin pose when everything settles. Your forearms press into the mat, your hips float upward, and your head hangs quietly somewhere below your heart. The shape looks simple from the outside. Inside, your shoulders are working harder than they do in almost any other pose you practice regularly.
Dolphin pose is the bridge between the poses you already know and the inversions you’re curious about. It asks for strength you may not have yet. It gives that strength back over weeks of patient practice. If your wrists ache in Downward-Facing Dog, this pose may quickly become the one you reach for most.
Quick Answer
Dolphin pose is a forearm-based inversion that builds shoulder and core strength without placing any pressure on the wrists. Hold it for 5 to 10 breaths, elbows shoulder-width apart and knees bent as much as you need.
What Dolphin Pose Does for Your Body
Dolphin pose builds strength in your shoulders, upper back, and core while stretching your hamstrings, calves, and the arches of your feet. You hold your weight on your forearms rather than your hands, which removes pressure from the wrists entirely.
The pose also turns you gently upside down. Your head drops below your heart, your gaze softens toward your navel, and the pace of your breathing usually slows without any effort on your part. Many practitioners describe dolphin pose as strenuous and calming at the same time, which is an unusual combination in a single shape.
What dolphin pose works in one sentence
Dolphin pose strengthens the deltoids, rotator cuff, serratus anterior, and abdominals while lengthening the hamstrings, calves, and spine.
Dolphin Pose Explained (Ardha Pincha Mayurasana)
Dolphin pose, known in Sanskrit as Ardha Pincha Mayurasana, is a forearm-based inversion that resembles Downward-Facing Dog with the forearms on the floor. The Sanskrit name translates roughly to half feathered peacock pose, which tells you where the shape is headed. The full feathered peacock is Pincha Mayurasana, the forearm stand. Dolphin pose is the half-way version, and it teaches nearly everything the full pose demands.
What makes dolphin pose distinct is the base. In Downward-Facing Dog you press through your palms. Your arms form a long lever from the floor to your shoulders. In dolphin pose that lever shortens dramatically. Your elbows sit directly under your shoulders, your forearms lie flat, and suddenly your shoulders have to do the work your hands were quietly helping with before. That’s why the pose feels so much harder than it looks.
Which muscles dolphin pose actually works
The muscles working hardest in dolphin pose are the deltoids, the rotator cuff, the serratus anterior, and the deep abdominals. Your triceps stabilize the elbows, and your trapezius helps organize the shoulder blades.
The serratus anterior deserves special attention because almost nobody talks about it. This muscle wraps around your ribs and connects to the inner edge of each shoulder blade. When it engages properly, your upper back feels broad and supported. Your chest lifts away from the floor. When it doesn’t engage, you sink between your shoulders and the pose collapses. On the lengthening side, dolphin pose stretches your hamstrings, calves, and the arches of your feet, much like poses that undo desk-bound rounding do for the front of the chest.
Where dolphin sits between plank and forearm stand
Dolphin pose sits exactly between forearm plank and Pincha Mayurasana in the strength progression. Forearm plank teaches you to press the floor away while your body stays horizontal. Dolphin pose adds the hip lift and the overhead shoulder position. Forearm stand asks for both at once, with your legs stacked above you and no floor to catch you.
Think of it as a three-rung ladder. Most practitioners skip the middle rung and wonder why the top one feels impossible. Spend a season on dolphin pose and the forearm stand stops being a mystery. If the idea of going upside down appeals to you while floor inversions still feel distant, a supported introduction to aerial practice offers the same sensation with a hammock holding your weight.
Is dolphin pose the same as puppy pose?
Dolphin pose and puppy pose are different shapes, though the names occasionally get swapped. Puppy pose, sometimes called melting heart, keeps your knees on the floor while your chest sinks toward the mat. Dolphin pose lifts the knees and inverts the body. If a class description confuses the two, the giveaway is simple: dolphin pose gets your hips in the air. And neither one has anything to do with an afternoon spent doing yoga surrounded by puppies, delightful as that is.
6 Benefits of Dolphin Pose, From Shoulders to Stress
Dolphin pose offers six benefits that hold up under honest scrutiny: shoulder and upper-back strength, hamstring and calf length, core stability, wrist relief, inversion readiness, and a genuine calming effect. You’ll find longer lists elsewhere, though many of those claims come from decades-old yoga texts without much behind them. These six are the ones you’ll actually feel.
Shoulder and upper-back strength
Dolphin pose builds shoulder and upper-back strength by asking your arms to support a large share of your body weight in an overhead position. That combination is rare. Most strength work happens with the arms below or in front of the body, which leaves the overhead range underdeveloped.
If you spend your days at a keyboard, this is the exact strength you’re missing. Hours of typing round the upper back and let the shoulder blades drift apart. Dolphin pose reverses that pattern in a way few poses can.
Hamstring and calf lengthening
Dolphin pose lengthens your hamstrings and calves as your hips lift, not as your heels descend. This distinction matters more than almost anything else in the pose. Beginners often walk their feet closer to their elbows to force their heels toward the mat. The heels touch, the stretch disappears, and the spine rounds.
Lift the sitting bones higher instead. Keep the feet where they are. Let the heels stay lifted off the floor for months if that’s what your body needs.
The quieting, inward-turning effect
Dolphin pose calms the mind because it places your head below your heart and gives your gaze a single soft point to rest on. There’s nothing mystical required here. The position naturally slows the breath. A slower breath tends to settle the nervous system.
In the yoga tradition, the forehead-down orientation of dolphin pose connects to Ajna, the third-eye center associated with clarity and inward focus. You don’t need to believe anything about energy to notice the effect. Still, if that framing interests you, a practice focused on the third eye explores it in more depth.
How Do You Do Dolphin Pose Step by Step?
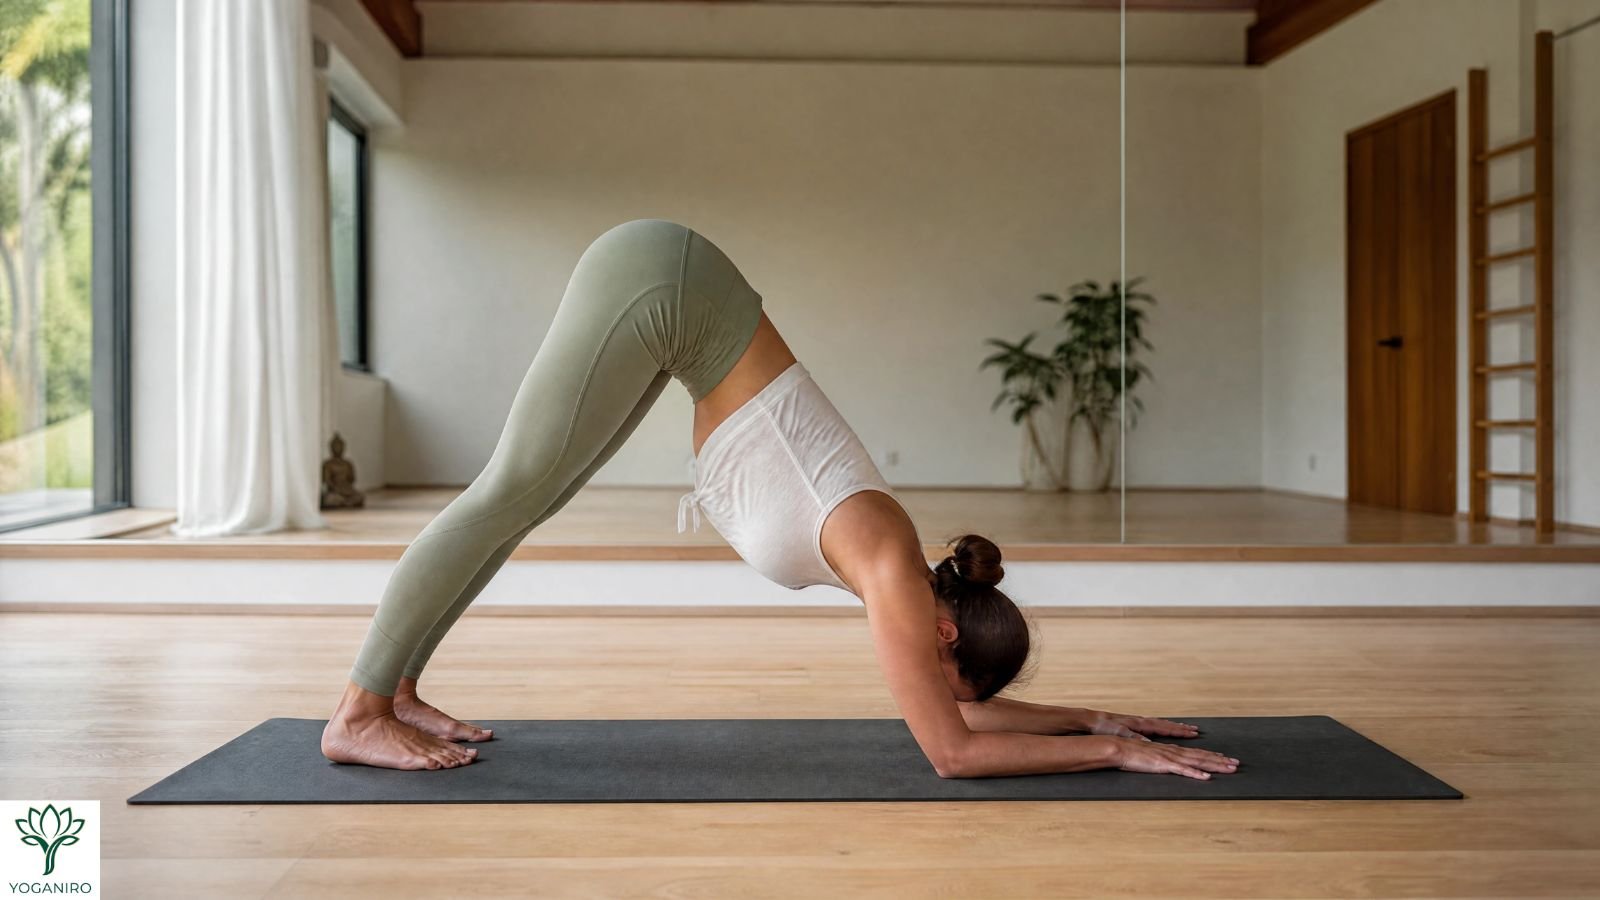
Here is how to do dolphin pose for beginners, in nine steps. Move slowly through the first three. The setup determines everything that follows, and a rushed foundation is the single most common reason the pose feels wrong.
Setting your forearms and elbows
Begin on your hands and knees with your knees under your hips and your wrists under your shoulders. That’s step one. For step two, find your true shoulder width before you commit: cross your arms and place each hand on the opposite elbow. The distance between your hands is exactly where your elbows belong. Step three, lower your forearms to the mat at that width, keeping them parallel to each other and to the side edges of your mat.
A quick tip that saves a lot of frustration. Press your inner wrists down as firmly as you press your elbows. Most people load the elbows and let the hands go light, which tips the weight toward the outer arms and makes the shoulders feel unstable.
Lifting the hips and finding length
Step four, tuck your toes under. Step five, draw your navel toward your spine and lift your knees away from the floor. Step six, send your tailbone up and back, as though someone were lifting you by the hips toward the ceiling behind you. Step seven, draw your shoulder blades down toward your tailbone and widen them across your back.
Your head hangs freely between your upper arms. Keep your knees bent. A bent-knee dolphin pose with a long spine beats a straight-legged one with a rounded upper back every single time.
How to come out without collapsing
Step eight, exhale and lower your knees to the mat with control. Step nine, press back into Child’s Pose and let your arms rest alongside your body or stretched forward, whichever feels better in your shoulders. If your lower back wants more after that, a gentle supine hip release makes a lovely follow-up.
This is where careless practitioners get hurt. After a long hold, the temptation is to drop out of the pose all at once. Your shoulders are fatigued and your stabilizers are slow to respond. Come down deliberately. Use Child’s Pose as the exit every time.
7 Alignment Cues and the Mistakes They Fix
Seven alignment cues will fix nearly every problem you’ll meet in dolphin pose. Each one exists because a specific mistake is so common that teachers watch for it before anything else.
Elbows shoulder-width, never wider
Keep your elbows exactly shoulder-width apart, because wider elbows drop your chest toward the floor and rob your shoulders of stability. Elbows drift outward the moment fatigue arrives, and most practitioners never notice it happening.
The fix takes ten seconds. Loop a strap around your upper arms just above the elbows, tightened to shoulder width. Press outward against the strap. Your arms learn the correct distance quickly. After a few weeks you rarely need the strap at all.
Square base or triangle base: which one do you need?
Use the square base for dolphin pose, with your forearms parallel and your hands directly in front of your elbows. The triangle base, where the hands come together and the elbows stay wide, belongs to Sirsasana, the headstand, rather than to dolphin pose.
Watch what your hands do as you lift your hips. If they slide toward each other, your shoulders are borrowing stability from a narrower base. That’s a useful signal rather than a failure. It usually means overhead shoulder mobility needs attention before the square base will feel available.
Where your head and neck belong
Let your head hang freely between your upper arms with your gaze toward your navel or between your legs. Your head should carry no weight at all.
The two mistakes here sit at opposite extremes. Some practitioners press the crown into the mat, which loads the cervical spine in a way this pose was never meant to. Others crane the chin forward to look ahead, which shortens the back of the neck. Neither serves you. Neutral and heavy is the goal.
Why your heels do not need to touch
Your heels do not need to reach the floor in dolphin pose, and forcing them down usually makes the pose worse. Heel contact depends on calf and hamstring length. Neither responds to willpower.
Consider the trade you’re making. Walk your feet in to plant the heels and your hips drop, your spine shortens, and the shoulder work you came for largely disappears. Leave the heels lifted off the floor and keep the long diagonal line from your hips to your elbows. That line is the pose.
Dolphin Pose vs. Downward Dog: Which One Do You Need?
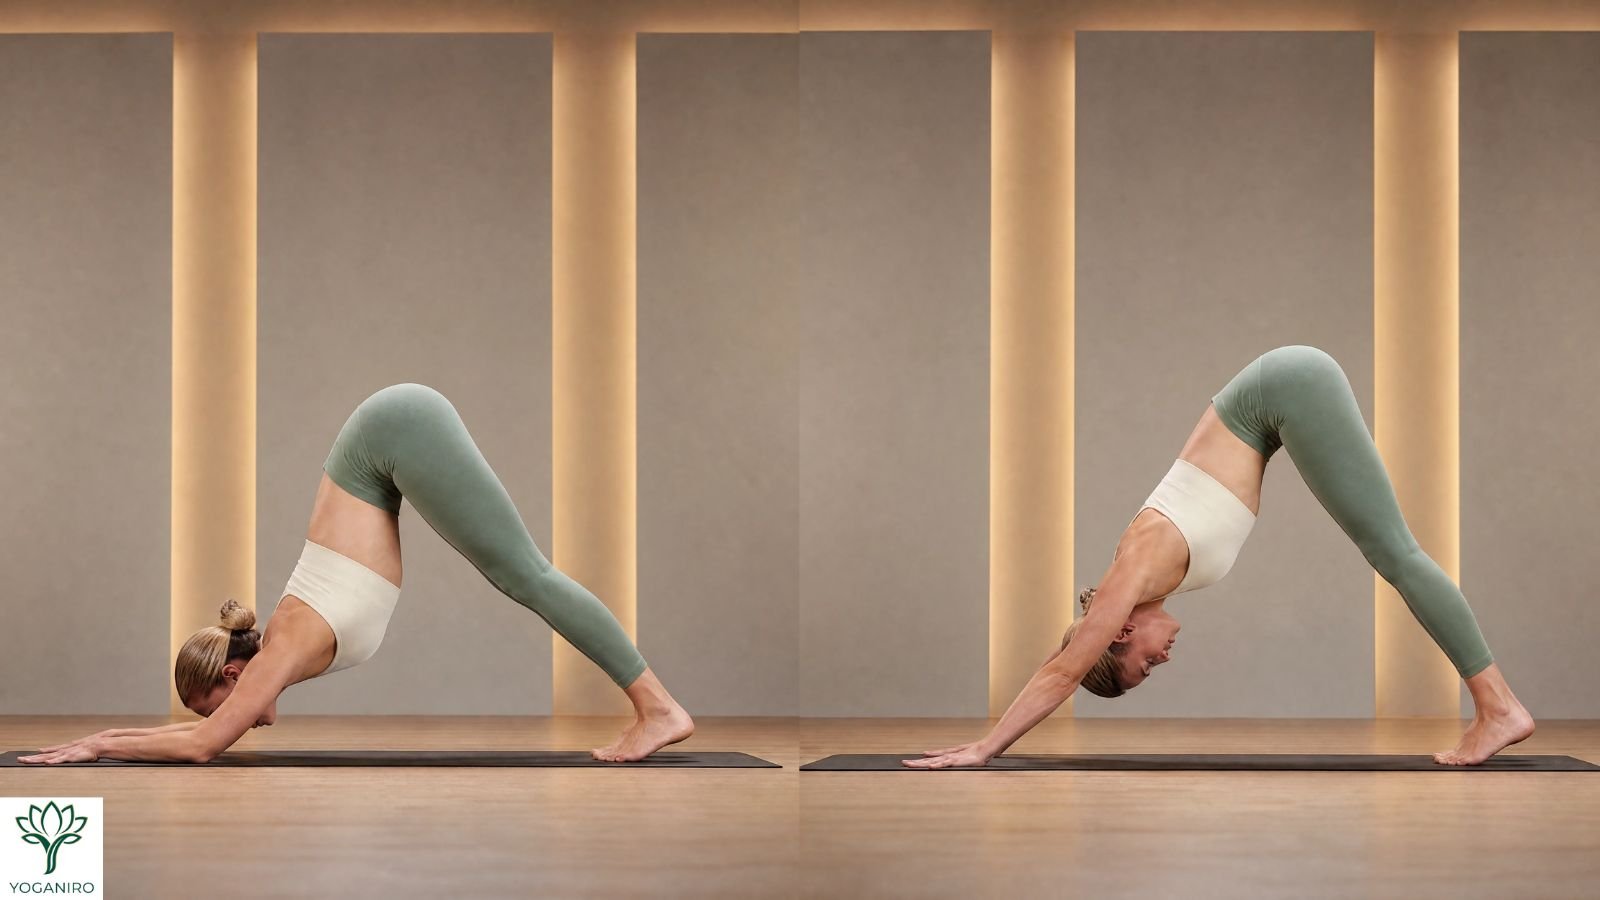
Choose dolphin pose when you want shoulder strength or wrist relief. Choose Downward-Facing Dog when you want a longer, more restful hold or a fuller hamstring stretch. The two poses look like cousins, though they train quite different things.
The practical difference comes down to where you bear weight and how long your arm lever is. Adho Mukha Svanasana loads the wrists and gives you a long, mechanically efficient arm. You can rest there. Dolphin pose loads the forearms, shortens that lever, and demands far more from the deltoids and serratus anterior. You cannot really rest in dolphin pose, which is precisely why it builds strength faster.
One more consideration decides it for many people. If you have wrist pain, carpal tunnel symptoms, or a healing wrist injury, dolphin pose gives you nearly all of the benefits of Downward Dog with none of the wrist extension. Among yoga poses for wrist pain instead of Downward Dog, this is the one most teachers reach for first.
Is dolphin pose harder than Downward Dog?
Yes, dolphin pose is meaningfully harder than Downward-Facing Dog for most practitioners. Three factors explain the difference: the shorter arm lever gives you less mechanical advantage, the deeper shoulder flexion demands more overhead mobility, and the forearm base offers a smaller platform to balance against. Expect to hold dolphin pose for roughly half as long as you comfortably hold Downward Dog.
How Long Should You Hold Dolphin Pose?
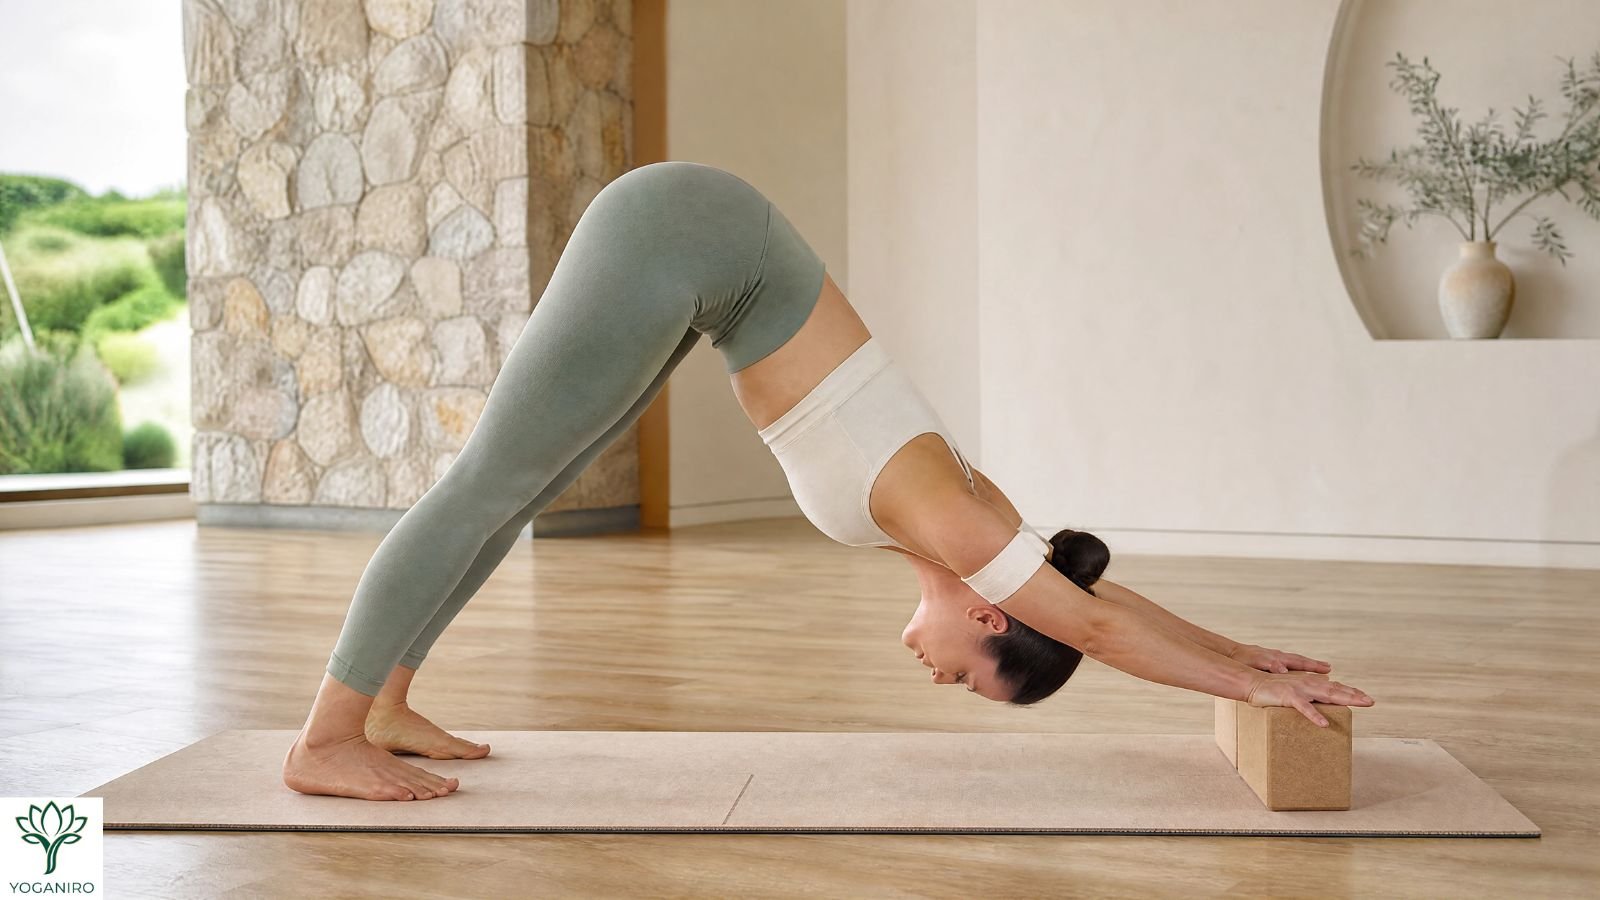
Hold dolphin pose for 5 to 10 breaths if you’re new to it, 30 to 45 seconds at an intermediate level, and up to 2 minutes once the shape feels stable. Published guidance varies widely, which is why so many practitioners feel unsure. What matters more than any number is that the quality of the shape ends the hold, not the clock.
Here’s the rule worth remembering. The moment your elbows widen, your chest sinks, or your upper back rounds, the pose has finished teaching you something useful. Come down. Rest. Go again if you’d like.
Hold times by experience level
Beginners should hold dolphin pose for 5 breaths, roughly 20 to 30 seconds, and repeat it 2 or 3 times with a short rest between rounds. Intermediate practitioners can hold for 30 to 45 seconds in a single round. Once your shoulders can maintain the shape without drifting, work toward 90 seconds to 2 minutes.
Three short holds beat one long, sloppy one. Your shoulders adapt to good repetitions rather than to time spent suffering.
How often should you practice dolphin pose?
Practice dolphin pose 2 to 4 times per week if you’re building strength, with at least one day of rest between your longer holds. Treat dolphin pose as strength training rather than as a stretch, because that’s how your body will interpret it.
Daily practice is fine when the holds stay short. Long holds every day tend to irritate the rotator cuff. Sore shoulders slow everything else down.
Modifications, Props, and the Path to Forearm Stand
Dolphin pose adapts to nearly every body with three props and a handful of adjustments. The pose you practice in week one should look quite different from the pose you practice in month six, and that’s the point.
Three props that change everything
A block, a strap, and a folded blanket solve most dolphin pose problems. Place a block between your hands, turned to its narrowest side, and press your palms against it to keep your arms from splaying. Loop a strap above your elbows at shoulder width to hold the base honest. Slide a folded blanket under your forearms if your elbows feel tender on a firm floor. Building a home prop kit is worth doing properly, and our guide to choosing the right bolster covers the one prop most practitioners buy last and end up using most.
Practicing dolphin pose with a block and strap together is the fastest way to teach your shoulders what correct feels like. Once the shape registers, the props come away on their own.
The wrist-friendly alternative to plank and Downward Dog
Dolphin pose is the standard wrist pain and carpal tunnel alternative to Downward-Facing Dog and Phalakasana, the plank pose, because it removes wrist extension entirely. If your wrists complain during a vinyasa class, you can substitute dolphin pose for Downward Dog and dolphin plank for regular plank without losing much.
A real scenario worth naming. Cyclists, guitarists, and anyone who spends hours on a keyboard often arrive at yoga with wrists that simply won’t tolerate repeated weight-bearing. Dolphin pose lets those practitioners build upper-body strength without ever provoking the joint that hurts. Pair it with a grounded standing shape to balance it out for a well-rounded practice.
A simple test for your shoulder mobility
One shoulder mobility test for dolphin pose takes about fifteen seconds. Kneel in front of a chair and place your elbows on the seat, shoulder-width apart. Look for a straight line running from your elbows through your shoulders to your hips.
If that line holds, your overhead shoulder mobility supports the full expression of dolphin pose. If your chest drops below the line or your upper back rounds, your shoulders need range before they need strength. Cow face pose arms, known in Sanskrit as Gomukhasana, and a few weeks of gentle overhead work will change the picture faster than grinding away at the pose itself.
Progressing safely toward Pincha Mayurasana
The dolphin pose to forearm stand progression takes four stages and usually several months. Stage one is a stable 60-second dolphin pose with a square base. Stage two moves the pose to a wall, with your feet walking closer to your elbows until your shoulders stack over them. Stage three adds one-legged dolphin, lifting a single leg toward the ceiling while your hips stay level. Stage four is a wall-supported Pincha Mayurasana.
Don’t rush the stages. Each one builds the scapular stability the next one assumes you already have.
Is Dolphin Pose Safe for Everyone?
Dolphin pose is safe for most healthy practitioners, though several conditions call for caution or a different pose entirely. Because dolphin pose is a mild inversion, the usual inversion considerations apply. Talk to your doctor before practicing if you have any medical condition that concerns you.
Who should modify or skip this pose
Skip dolphin pose if you have glaucoma or another condition involving eye pressure, uncontrolled high blood pressure, a recent stroke, an active migraine, or an acute shoulder or neck injury. Dolphin pose contraindications for high blood pressure are the same as for any inverted shape. A qualified teacher can usually offer an alternative that gives you similar benefits.
Use your own judgment alongside professional advice. Pain is information. No yoga pose is worth pushing through it.
Neck, shoulder, and pregnancy considerations
Modify dolphin pose during pregnancy, particularly in the second and third trimesters, when a head-down position often becomes uncomfortable. Many pregnant practitioners find a wall-supported version far more manageable, with the forearms on the wall rather than the floor.
If you’re recovering from shoulder surgery or living with cervical spine sensitivity, work with a physical therapist or an experienced teacher before adding dolphin pose to your practice. Studios that teach alignment carefully are worth seeking out, whether that’s a boutique studio in New York or a community-minded practice space in Portland. The forearm position is gentle on the wrists, though it still asks a great deal of the shoulder joint.
Dolphin Pose FAQs
Is dolphin pose good for beginners?
Yes, dolphin pose suits beginners well as long as you keep your knees bent and your holds short. Start with 5 breaths, use a strap above your elbows to maintain shoulder width, and rest in Child’s Pose between rounds. The pose demands strength rather than flexibility. Strength arrives steadily with consistent practice.
Why can’t I straighten my legs in dolphin pose?
You can’t straighten your legs in dolphin pose because your hamstrings and calves are shorter than the shape currently requires. That’s completely normal. Straightening the legs before your hamstrings allow it forces your upper back to round, which undoes the shoulder work. Keep the knees bent and prioritize a long spine instead.
Does dolphin pose build shoulder strength?
Yes, dolphin pose builds real shoulder strength by loading the deltoids, rotator cuff, and serratus anterior in an overhead position. Practice it 2 to 4 times per week with holds of 30 seconds or more. That work develops the specific stability forearm stand and headstand require. Most practitioners notice a difference within four to six weeks.
What is the difference between dolphin pose and dolphin plank?
Dolphin pose lifts the hips high with the body in an inverted V shape, while dolphin plank holds the body in a straight horizontal line with the shoulders stacked over the elbows. Dolphin pose emphasizes shoulder flexion and hamstring length. Dolphin plank emphasizes core strength. Both use the same forearm base.
Can dolphin pose help with headaches or stress?
Dolphin pose may ease tension-related stress for some practitioners, largely because the head-down position and slow breathing help settle the nervous system. That said, dolphin pose is not a treatment for headaches. Inversions can worsen migraines for some people. If headaches are frequent or severe, speak with your doctor.
What is the hardest yoga pose ever?
No single pose is objectively the hardest, because difficulty depends on your proportions, mobility, and injury history. Teachers most often name Taraksvasana (handstand scorpion), Tittibhasana (firefly), and Astavakrasana (eight-angle pose) as the most demanding arm balances. Dolphin pose sits far below those, though it opens the door to the inversions that lead there.
Why is Dolphin Pose so hard for me?
It demands overhead shoulder mobility and scapular strength that ordinary daily activity never builds. The short forearm lever removes the mechanical advantage your hands give you in Downward Dog, so the deltoids and serratus anterior carry the load directly. Tight hamstrings compound it. It’s a strength gap, not a fitness failing.
Final Thoughts
Come back to the beginning. Forearms grounded, hips rising, the world quietly upside down for a handful of breaths. Dolphin pose asks for patience in a way that flashier poses don’t. It rewards that patience generously.
Give it a season. Practice a few short holds, three times a week, and watch what happens to your shoulders by the end of the second month. On days when strength isn’t what you need, a slower practice built on long, passive holds offers the other half of the conversation.
Keep Practicing
When you want company on the mat, try poses designed for two, partner work that builds genuine trust, or balances built for three. For the quieter side of the practice, read our introduction to tantric yoga or a collection of words worth carrying to the mat.
Trusted Resources
- Cleveland Clinic — How to Find the Best Yoga Class for You — practical guidance on choosing a style and level that matches your body.
- Mayo Clinic — Relaxation Techniques — evidence-based background on how slow breathing settles the stress response.
- Healthline — Rotator Cuff Anatomy — a medically reviewed overview of the four rotator cuff muscles that stabilize the shoulder in overhead positions.
About Yoganiro
Yoganiro is a yoga and wellness publication dedicated to clear, honest, and practical guidance. Every guide is fact-checked against credible sources such as Yoga Journal, Harvard Health, and peer-reviewed research before it is published. Questions or corrections? Reach out through our contact page.
Disclaimer
This article is for general educational purposes and is not medical advice. Consult a qualified healthcare provider before beginning any new movement practice, particularly if you are pregnant, recovering from injury, or managing a medical condition.

Yoganiro was founded by Abdul Rehman with a passion for yoga, wellness, and mindful living. The goal behind Yoganiro is to inspire people through simple yoga practices, wellness tips, and healthy lifestyle content that promotes balance, peace, and overall well-being.